Exmark Z Turf Equipment Backyard Life
  • Skip to primary navigation
  • Skip to main content
  • Skip to primary sidebar

Exmark's Backyard Life

Living Happens Outdoors

  • Mowing
  • Outdoor Living
  • Lawn + Garden
  • Ambassadors
  • Originals
  • About Exmark
  • Subscribe to Backyard Life
Search

A Northeast Georgia Riverfront Dream Yard

September 12, 2020 by Exmark

Want landscape inspiration for your active family? If so, see how the Stinchcomb Family’s backyard play and relaxation spots provide something for the entire family.

Join landscape design expert and Dream Yards host Jane Waldrop as she tours the Stinchcomb family’s North Atlanta dream yard—just steps from the Chattahoochee River!

Landscape Inspiration: Accessibility and Nature

Soon after arriving at Matt and Jenny’s coastal-inspired home, the couple was asked to point out the landscape inspiration behind their dream yard. Matt notes their home’s stone accents that play off the Chattahoochee River’s rock-lined banks. Jenny wanted a simple, functional home—and a pool that resembled a traditional “watering hole.” Whether 8:00 in the morning or 10:00 at night, the Stinchcombs dreamed of a home that provided access to their entire backyard.

Family Favorites

When asked about their favorite backyard spots, Matt quickly mentions the pool—their kids’ favorite place to play! A close second, he notes, is the fire pit river deck in the rear of their yard. Primarily in the fall, it’s a special place, Matt says. Jenny’s favorite yard feature, hands down, is its accessibility to the Chattahoochee River. Having grown up floating the “Hooch” since childhood, being able to do the same thing now is a dream come true, she says.

A Reflection of Togetherness

We asked how the Stinchcomb’s dream yard is a reflection of their family, and received feedback that was, well, all about the outdoors! Jenny points out the flexibility their outdoor living spaces provide. From a back porch and river deck to unwind on, to the river, pool and interactive game areas to play in, there’s a “pocket” for everyone, she says.

Partners in Yard Perfection

Matt and Jenny end our visit by thanking their landscape partners at Imagescapes for creating, and maintaining, their dream yard. Having worked together since the couple moved in years ago, Matt points out that the success is due in large part to the Exmark mowers Imagescapes exclusively uses.

Now that you’ve had a taste, what will your dream yard look like?

Filed Under: Outdoor Living Tagged With: Landscaping, plan

How to Build a Pergola

September 8, 2020 by Exmark

Done-In-A-Weekend Extreme Project: Made In The Shade

Want to learn how to build a pergola, complete with floor decking? Then, join landscape design expert and Done-In-A-Weekend Extreme Projects host Doug Scott to see how it’s done. And, thanks to the help of Mike Jones and his team at Jones Refinishing, we mean done right! We also have a pergola build plan download if you want to give this project a try.

Reasons to Consider Building Your Own Pergola

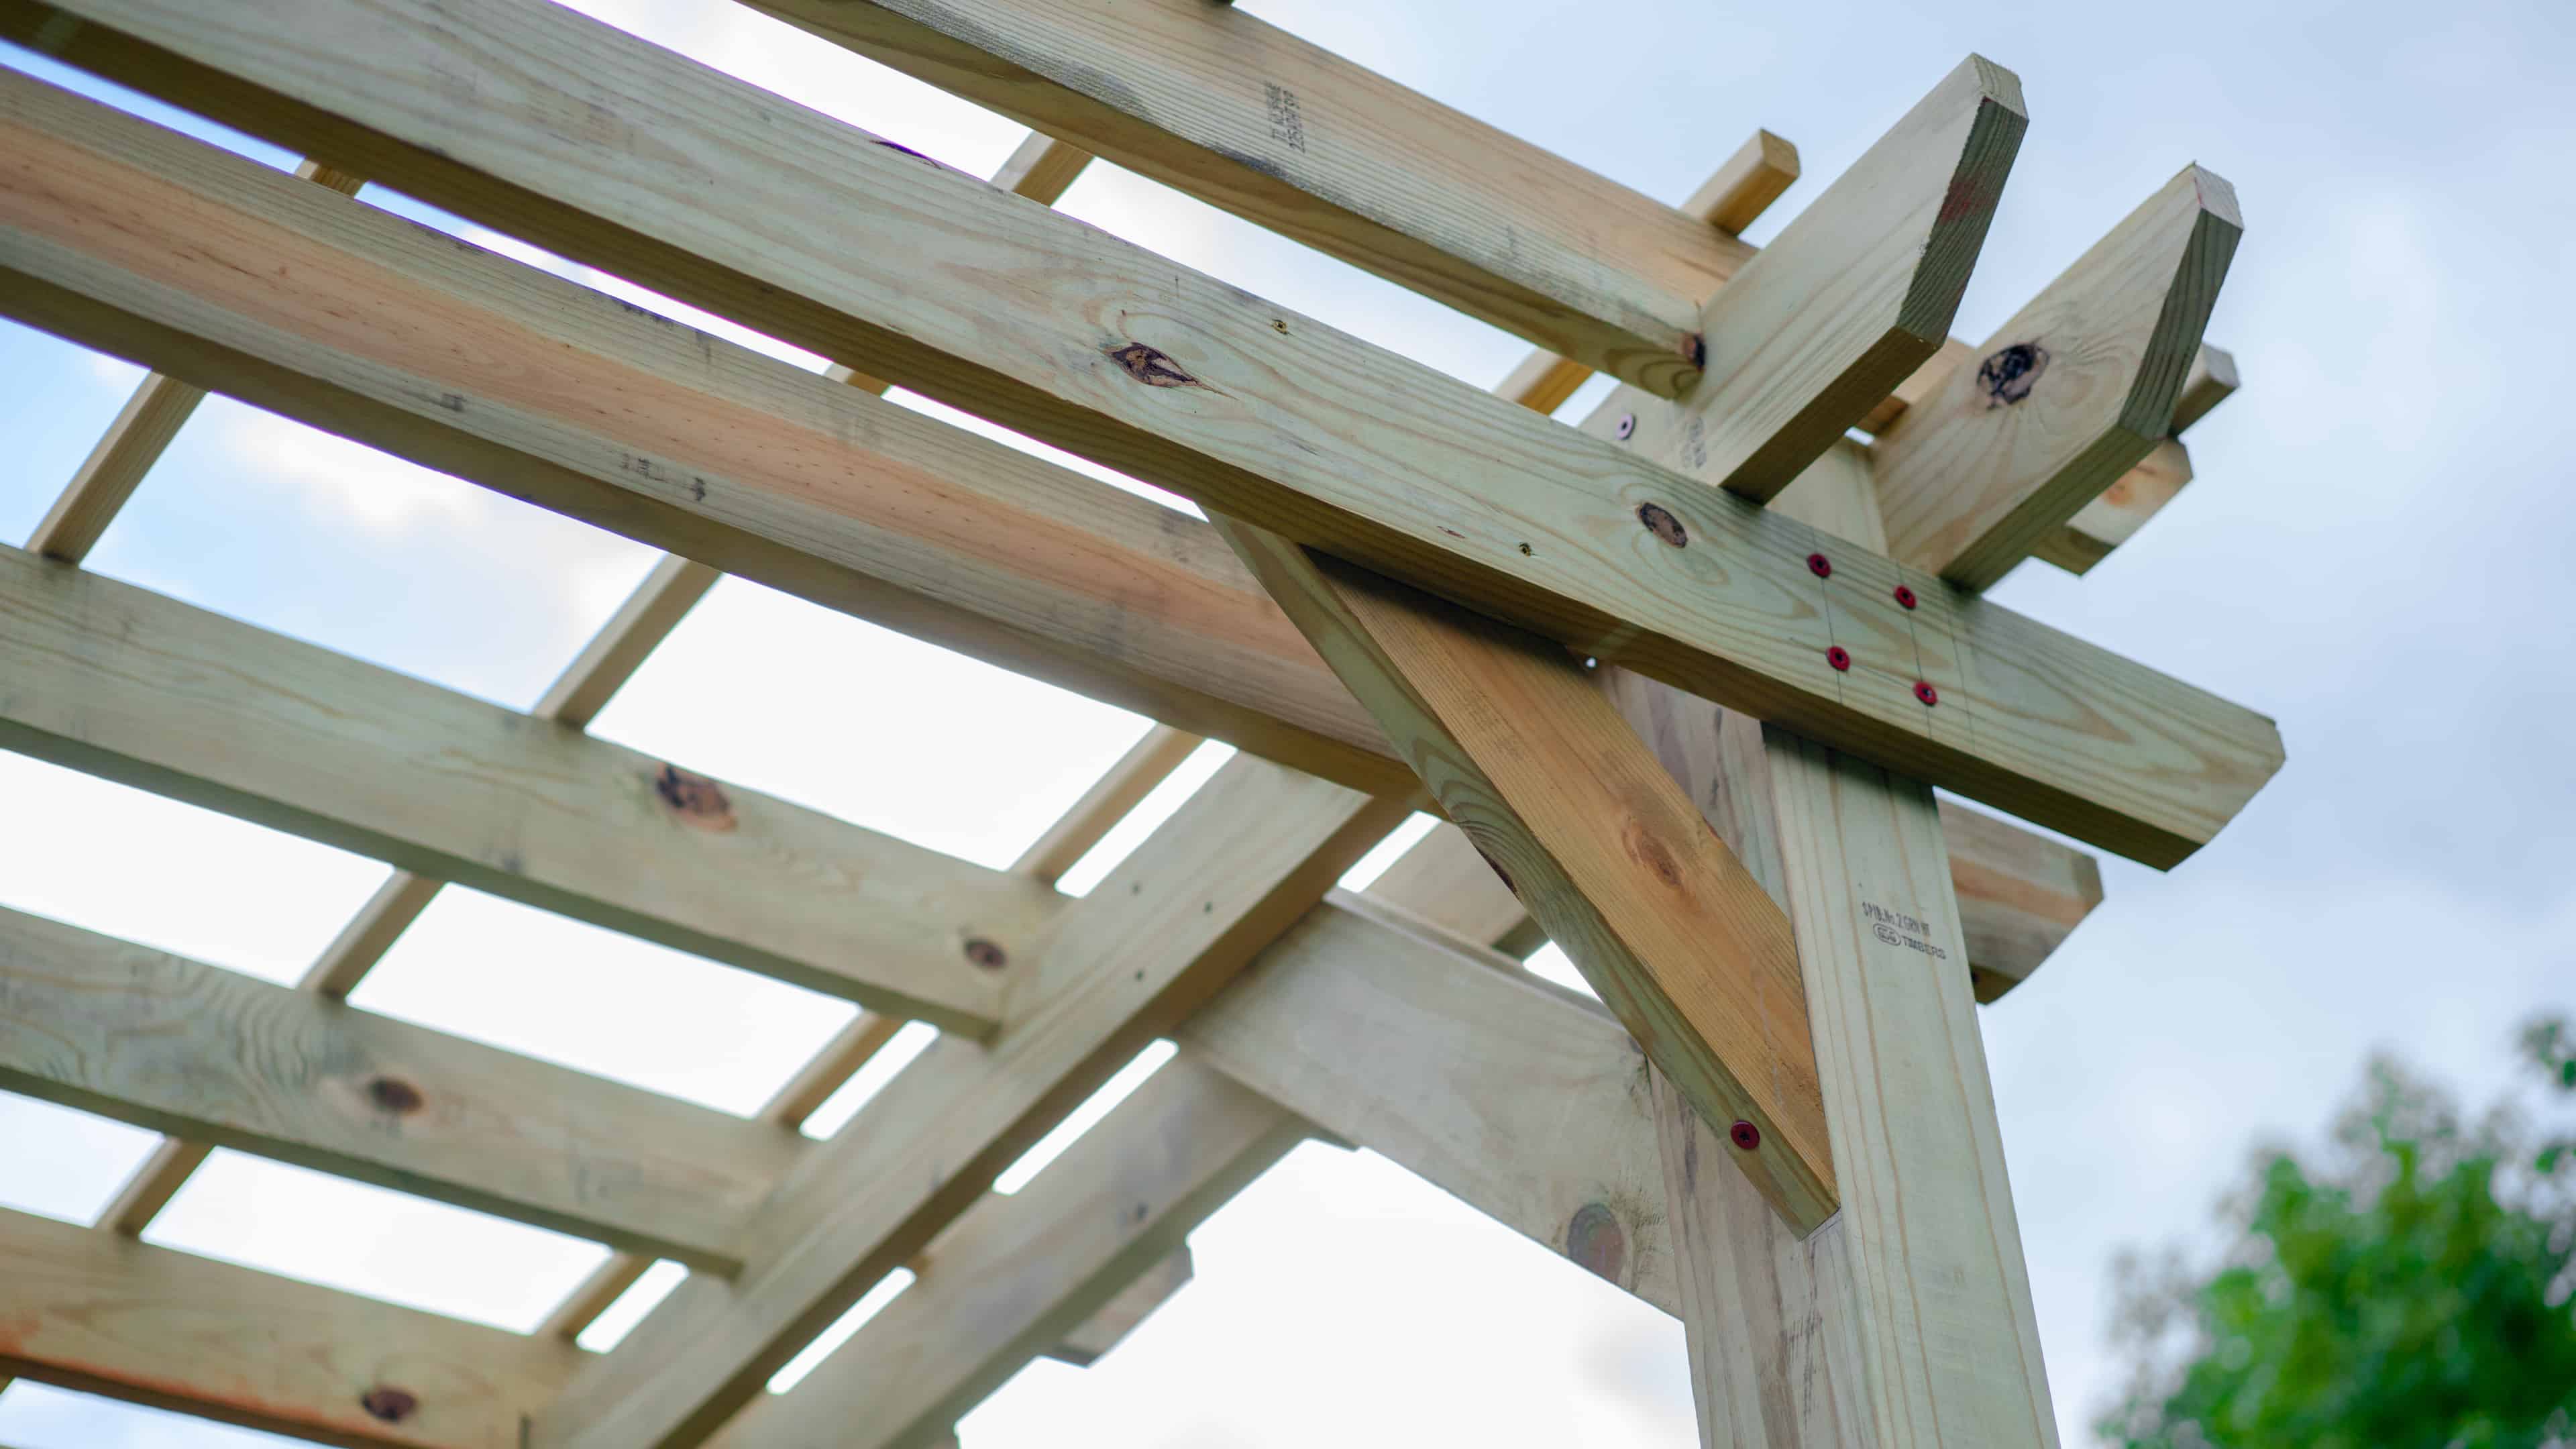
Pergola’s increase your outdoor living space by giving you additional comfortable, protected outdoor gathering space. Pergolas also increase yard and home beauty and interest and giving you a place to hang those potted plants. In this video, Doug tags along as Mike and his crew build a 10-foot x 12-foot x 8-foot pergola and decked floor.

Pergola Build: Day 1

Mike begins day 1 by walking Doug through the initial build steps. After determining the pergola’s yard placement, grade stakes and masonry twine are used to square the base. This is done prior to digging postholes to ensure the pergola’s base is square. Mike notes that if step one’s not square, the finished product won’t be, either. Once all four post holes are dug, posts will then be set, although temporarily at this point. Mike explains the importance of first placing, squaring, and bracing each post before setting them with cement.

Before moving on, Doug asks Mike about the materials used in this pergola project. Mike notes it’s a pretty basic lumber list. They’re using 6x6s for the posts, 2x6s for the cross-braces and rafters, and 2x2s to finish off the top. For complete pergola materials, cut lists and build steps, reference this downloadable.pdf.

Once all four posts are squared and braced, cross beams are permanently bolted in place. Concrete is then poured into all four postholes, and left to set for approximately one hour. In the meantime, rafters are cut and notched to fit the pergola’s bracing. After the concrete has set, each rafter is then secured across the top of the pergola.

Day 2 of the pergola build project includes building the deck.
The finished pergola deck looks incredible.

Building the Pergola Deck: Day 2

Day 2 of the build begins with the installation of one final pergola rafter. Mike jokes that someone miscalculated the lumber list. And, that it “could have been him!” Once installed, 2x2s are then cut and secured to the top of the pergola.

Now, it’s time to move on to the pergola deck. Mike provides a basic lumber rundown: 2x10s, 2x8s and 5/4” decking boards. Once the deck’s completed, decorative corner bracing is installed to provide structural integrity—and a stylish, finished look. Download the DIY Pergola Build plans here.

With the pergola finished, Doug comments on how incredible it looks. Mike’s equally happy with how it turned out. And, that the homeowners he and his crew built it for are pleased.

To learn more about Jones Refinishing, visit the company’s Facebook page.

More DIY Build Projects:

  • How to Install an Outdoor Canopy
  • How to Build a Fire Pit and Adirondack Chair
  • How to Build a Boulder Retaining Wall

Filed Under: Outdoor Living Tagged With: build

How to Install an Underdeck Ceiling

September 6, 2020 by Exmark

Done-In-A-Weekend Extreme Project: Undercover Outdoor Living

Want to learn how to install an underdeck ceiling? Then join Done-In-A-Weekend Extreme Projects host Doug Scott to see how you can turn unused space into additional outdoor living space. Not to mention, space that creates shade, privacy and water diversion!

In this episode, Doug joins Heath Bowman, founder and CEO of Southeastern Underdeck, and his install crew at a North Atlanta residence to see exactly how it’s done.

Heath begins by outlining for Doug the basic steps to install an underdeck ceiling (this one was 400 sq feet):

1. Spin a Level Laser to Determine the Underdeck Pitch

This move ensures that all captured water runs to the downspots and away from the home. Next, the underdeck begins at three inches below the band of the home. The band is the boards that cover the seam where the house foundation and sill plate meet. From where it starts, the underdeck is then pitched 1/8 of an inch per foot away from the home.

2. Install Wooden End Caps, Wall Channels and Gutters

Although other end cap materials can be used, Heath recommends using treated lumber. Doing so, he says, will likely match the look of your existing decking, and will help protect against both wildlife (birds and squirrels, for instance) and the elements.

3. Install Underdeck Panels and Optional Accessories

As the panels are being installed, Heath’s crew installs optional accessories—lights, fans and Bluetooth speakers. In addition, Heath tells Doug about the great number of panel and trim colors, and textures that are available for homeowners. This allows folks to mix and match panel/trim combinations.

Finally, Doug ends by asking Heath about the maintenance involved in an underdeck system. Just like gutters, Heath notes that he instructs his clients to plan on maintaining their underdeck every three to five years.

And, it’s that easy. In just two short days, Heath and his team have transformed this home’s underdeck space into additional dry, protected usable outdoor living space. Not to mention, it looks absolutely amazing, too!

To learn more about Southeastern Underdeck, visit Southeasternunderdeck.com.

More Backyard Projects:

  • How to Build a Pergola with Plans
  • How to Install an Outdoor Canopy
  • DIY Outdoor TV Cabinet Build

Filed Under: Outdoor Living Tagged With: build

How to Build a Boulder Retaining Wall

September 6, 2020 by Exmark

Done-In-A-Weekend Extreme Project: Boulder Wall

Interested in learning how to build a boulder retaining wall? If so, join Done-In-A-Weekend Extreme Projects host Doug Scott to do just that. He’ll show you just how easy rock retaining walls are to build, and the additional usable space—and, beauty—they’ll create.

Doug opens the video by introducing longtime friend and business colleague—King Landscaping’s Holly Brooks.

Holly then walks Doug through the basic steps involved in making her current project, a 45-foot long by 29-inch high dry-stack boulder retaining wall:

1. Marking and Excavating the Boulder Wall Location

For this particular build, Holly notes the minimal amount of “base work” to be done. This is because there’s already an artificial grade built up behind where the wall will reside.

2. Prepping the Ground by Tamping Down the Footing Area

For this particular build, Holly notes that no compactable base product will be needed. However, she outlines that in other instances a product like crush and run might be needed for fortification. When asked about tamping, Holly suggests—depending on wall height—either a hand or plate tamper, or tracking machine.

3. Laying Central Wall Steps

Before beginning to lay the actual rock retaining wall, this project’s central rock stairs will be put into place. This is done first, as the first step will set the top of the wall’s elevation. In order to minimize trip hazards, Holly suggests using a consistent stair “rise” that’s between 6 and 7 inches.

4. Constructing the Dry Stack Boulder Retaining Wall

Starting on one side, Holly’s crew begins constructing the base (first) course of the wall. Once the base course has been placed, soil is then placed between it and the next course. This process is then repeated to reach the desired wall height, with each course being slightly offset back from the course beneath it. This helps to both stabilize and level each of the rocks—and courses. Finally, to help with drainage, the crew creates a swale behind the top rock course. This step helps ensure that water will run off either side of the wall, and not sheet flow over the wall.

As Holly’s crew finishes the project, she and Doug end the video by discussing why homeowners would and would not choose to build a boulder retaining wall. Holly points out the pros—namely, cost and aesthetics. Then she discusses the cons, primarily safety concerns when walls taller than 30 inches are needed.

To learn more about King Landscaping, visit Kinglandscapingatl.com.

Filed Under: Lawn + Garden Tagged With: build, Landscaping, plan

How to Build a Water Feature

August 21, 2020 by Exmark

Done-In-A-Weekend Extreme Project: Aquatic Additions

Want to learn how to build a water feature, and add beauty and interest to your yard? Then, watch as Done-In-A-Weekend Extreme Projects video host Doug Scott joins Greg Hutson from All Outdoor Lawn Services. Greg and his team will demonstrate how to build a gorgeous water feature—complete with ponds, streams and waterfalls—in a hilly backyard.

Steps for How to Build a Water Feature

1. To start, after Greg meets with the homeowner to determine the exact location of a water feature, he outlines that area with marking paint. Then, his crew digs out the area for that water feature.

2. Once the location has been dug, Greg’s crew installs a pre-liner. This serves as protection for the heavy duty, 50 mil. liner that will be installed next.

3. When the pre-liner has been put into place, the crew installs the heavy duty, 50 mil. liner. This is somewhat of a tedious process, as it has to be creased and bent to properly form to the area that’s been dug out.

4. With the heavy duty liner in place, Greg’s crew does what few water feature install companies do: Add concrete to the upper and lower ponds, and in several other areas within the water feature. This step helps ensure that the heavy duty liner doesn’t incur any leaks. Greg’s crew also installs a lower skimmer box and upper waterfall box to recirculate water in the feature.

5. Next, the crew begins placing a mixture of boulders and flagstone in the feature. This is where the real beauty of the project begins to take shape!

6. After all of the rocks have been placed, the crew trims the pre-liner and heavy duty liner around the exterior. Then, they begin filling the feature with water to ensure everything’s working properly. Namely, that it’s producing the right amount of noise, and as much water as possible is staying within the feature’s confines.

7. Finally, the crew installs mulch and plants around the water feature’s outer perimeter to beautify—and finish off—the project.

To learn how to keep your backyard water feature flowing clear and clean, check out these articles:

  • Water Feature Maintenance Tips
  • How to Manage a Pond with Grae Buck

To learn more about All Outdoor Lawn Services, visit Alloutdoorllc.com.

Filed Under: Lawn + Garden Tagged With: build, Landscaping

Raised Garden Bed Build With Joe Lamp’l

August 21, 2020 by Exmark

Done-In-A-Weekend Extreme Project: Raising the Bar

Interested in learning more about raised bed gardening? If so, watch gardening expert Joe Lamp’l and Done-In-A-Weekend Extreme host Doug Scott demonstrate a raised garden bed build. Then, download plans to build the raised bed for vegetables featured in this video: Raised Garden Bed Plans PDF

Raised beds are fairly easy to build and maintain. Plus, they are a great way to grow vegetables at home. Besides build materials and the desired plants, all you’ll need to create a DIY garden box is high-quality soil and ample water.

Raised Garden Bed Advantages

  • Make it easier to facilitate ideal soil for the plants you wish to grow
  • Easy to work in and maintain. Since the soil level is raised you don’t have to bend over quite as much.
  • Great for growing small plots of veggies and flowers and unlike containers, raised beds do not have bottoms so they allow plant roots to grow further into the ground for nutrients.
  • An aesthetically beautiful hardscape feature. Garden boxes create visual interest and the space between your boxes create pathways.
  • Easy to build. You just need lumber and other materials that you probably have in your yard (i.e., rocks, old tubs)

What is the Best Size for Raised Garden Beds

  • 3’ to 4’ wide is always best. This is because it is easy to reach the center of the bed from either side. It’s important to keep the width narrow to avoid having to step on the bed since this would compress the soil. 
  • Length is usually a personal preference, or whatever fits in your overall design and space
  • At least 6” high; 12” is common, and anything higher is a bonus.

Can You Use Treated Lumber for Raised Garden Beds

  • Treated lumber is ok, but untreated lumber may be preferred for vegetable gardens because there are no chemicals on this wood.
  • According to the OSU Extension service, the consensus is that the chemicals do leach out of the wood into the soil and can be taken in by plants in very small amounts. However, there does not seem to be any research that suggests the level of the chemicals is significant enough to be of concern for human health.

Where is the Best Place to Build a Raised Bed

  • On level ground
  • With full sun exposure
  • Near convenient access to a water supply
  • The long side of the bed should face south because this assures equal light exposure to all plants growing in the bed.

DIY Raised Garden Bed Instructions

Download plans for the raised bed for vegetables featured in this video: Raised Garden Bed Plans

Materials Needed to Build a 10’ x 4’ x 18” Raised Bed

  • (9) 6” x 6” x 12’ cedar timbers
  • Tape measure, t-square and pencil
  • Saw and extension cord
  • (1) box of 10” heavy-duty, exterior-grade wood screws
  • (10) 24” x ½” rebar stakes
  • (20) 10” galvanized timber spikes
  • Sledgehammer
  • Impact drill and long drill bit
  • Level
  • Hammer
  • Shovels
  • Hardware cloth, wire cutters and fence staples
  • Work gloves, safety glasses and ear plugs
  • Wheelbarrow (to transport soil)

Steps to build a 10’ x 4’ x 18” raised garden bed.

  1. Cut the wood

    Begin by cutting (6) 6 x 6 timbers—each measuring 10-feet, 6-inches in length—and (6) 6 X 6 timbers, each measuring 4-feet, 6-inches in length. Then, drill the appropriate rebar holes in each timber, as outlined in our build schematic.

  2. Level your bed location

    Once the first layer of timbers has been placed, leveled, and squared in your desired bed location, fasten the corners using 10-inch wood screws. Secure the entire layer to the ground with 10 pieces of rebar.

  3. Layer your timbers

    Next, place the second layer of timbers—staggering the corners and fastening them with wood screws. When that is done, secure the entire layer to the first with (10) 8-inch galvanized spikes

  4. Add hardware cloth

    After hardware cloth has been installed, place the third and final layer of timbers. Again, stagger the corners and secure them to one another with wood screws. Secure this layer to the second with galvanized spikes.

  5. Fill your bed with soil and plants

    Several weeks after the build is complete, Doug returns to the owners’ residence to see the raised bed—full of veggies!

To learn more about raised garden beds, and other popular horticulture topics, visit Joe Lamp’l at Joegardener.com and Growingagreenerworld.com.

More Backyard Garden Tips:

  • Find Your Plant Hardiness Zone
  • How to Prevent Weeds in Your Garden
  • Tips For Maintaining Healthy Garden Soil

Filed Under: Lawn + Garden Tagged With: build, garden

  • « Go to Previous Page
  • Go to page 1
  • Interim pages omitted …
  • Go to page 5
  • Go to page 6
  • Go to page 7
  • Go to page 8
  • Go to page 9
  • Interim pages omitted …
  • Go to page 11
  • Go to Next Page »

Primary Sidebar

Stay Connected

Keep living your best backyard life all year round. Get alerts on the latest Original Series updates, along with the inspiration and know-how you need to enjoy backyard life to the fullest!

Loading
  • Home
  • Mowing
  • Outdoor Living
  • Lawn + Garden
  • Ambassadors
  • Originals
  • Subscribe
  • Facebook
  • x
  • Instagram
  • YouTube
  • Pinterest

Copyright © 2025 EXMARK - Backyard Life

  • Privacy Policy
  • Terms of Use
  • DMCA

Trending