
Raised Garden Bed Build With Joe Lamp’l
Done-In-A-Weekend Extreme Project: Raising the Bar
Interested in learning more about raised bed gardening? If so, watch gardening expert Joe Lamp’l and Done-In-A-Weekend Extreme host Doug Scott demonstrate a raised garden bed build. Then, download plans to build the raised bed for vegetables featured in this video: Raised Garden Bed Plans PDF
Raised beds are fairly easy to build and maintain. Plus, they are a great way to grow vegetables at home. Besides build materials and the desired plants, all you’ll need to create a DIY garden box is high-quality soil and ample water.
Raised Garden Bed Advantages
- Make it easier to facilitate ideal soil for the plants you wish to grow
- Easy to work in and maintain. Since the soil level is raised you don’t have to bend over quite as much.
- Great for growing small plots of veggies and flowers and unlike containers, raised beds do not have bottoms so they allow plant roots to grow further into the ground for nutrients.
- An aesthetically beautiful hardscape feature. Garden boxes create visual interest and the space between your boxes create pathways.
- Easy to build. You just need lumber and other materials that you probably have in your yard (i.e., rocks, old tubs)
What is the Best Size for Raised Garden Beds
- 3’ to 4’ wide is always best. This is because it is easy to reach the center of the bed from either side. It’s important to keep the width narrow to avoid having to step on the bed since this would compress the soil.
- Length is usually a personal preference, or whatever fits in your overall design and space
- At least 6” high; 12” is common, and anything higher is a bonus.
Can You Use Treated Lumber for Raised Garden Beds
- Treated lumber is ok, but untreated lumber may be preferred for vegetable gardens because there are no chemicals on this wood.
- According to the OSU Extension service, the consensus is that the chemicals do leach out of the wood into the soil and can be taken in by plants in very small amounts. However, there does not seem to be any research that suggests the level of the chemicals is significant enough to be of concern for human health.
Where is the Best Place to Build a Raised Bed
- On level ground
- With full sun exposure
- Near convenient access to a water supply
- The long side of the bed should face south because this assures equal light exposure to all plants growing in the bed.
DIY Raised Garden Bed Instructions
Download plans for the raised bed for vegetables featured in this video: Raised Garden Bed Plans
Materials Needed to Build a 10’ x 4’ x 18” Raised Bed
- (9) 6” x 6” x 12’ cedar timbers
- Tape measure, t-square and pencil
- Saw and extension cord
- (1) box of 10” heavy-duty, exterior-grade wood screws
- (10) 24” x ½” rebar stakes
- (20) 10” galvanized timber spikes
- Sledgehammer
- Impact drill and long drill bit
- Level
- Hammer
- Shovels
- Hardware cloth, wire cutters and fence staples
- Work gloves, safety glasses and ear plugs
- Wheelbarrow (to transport soil)
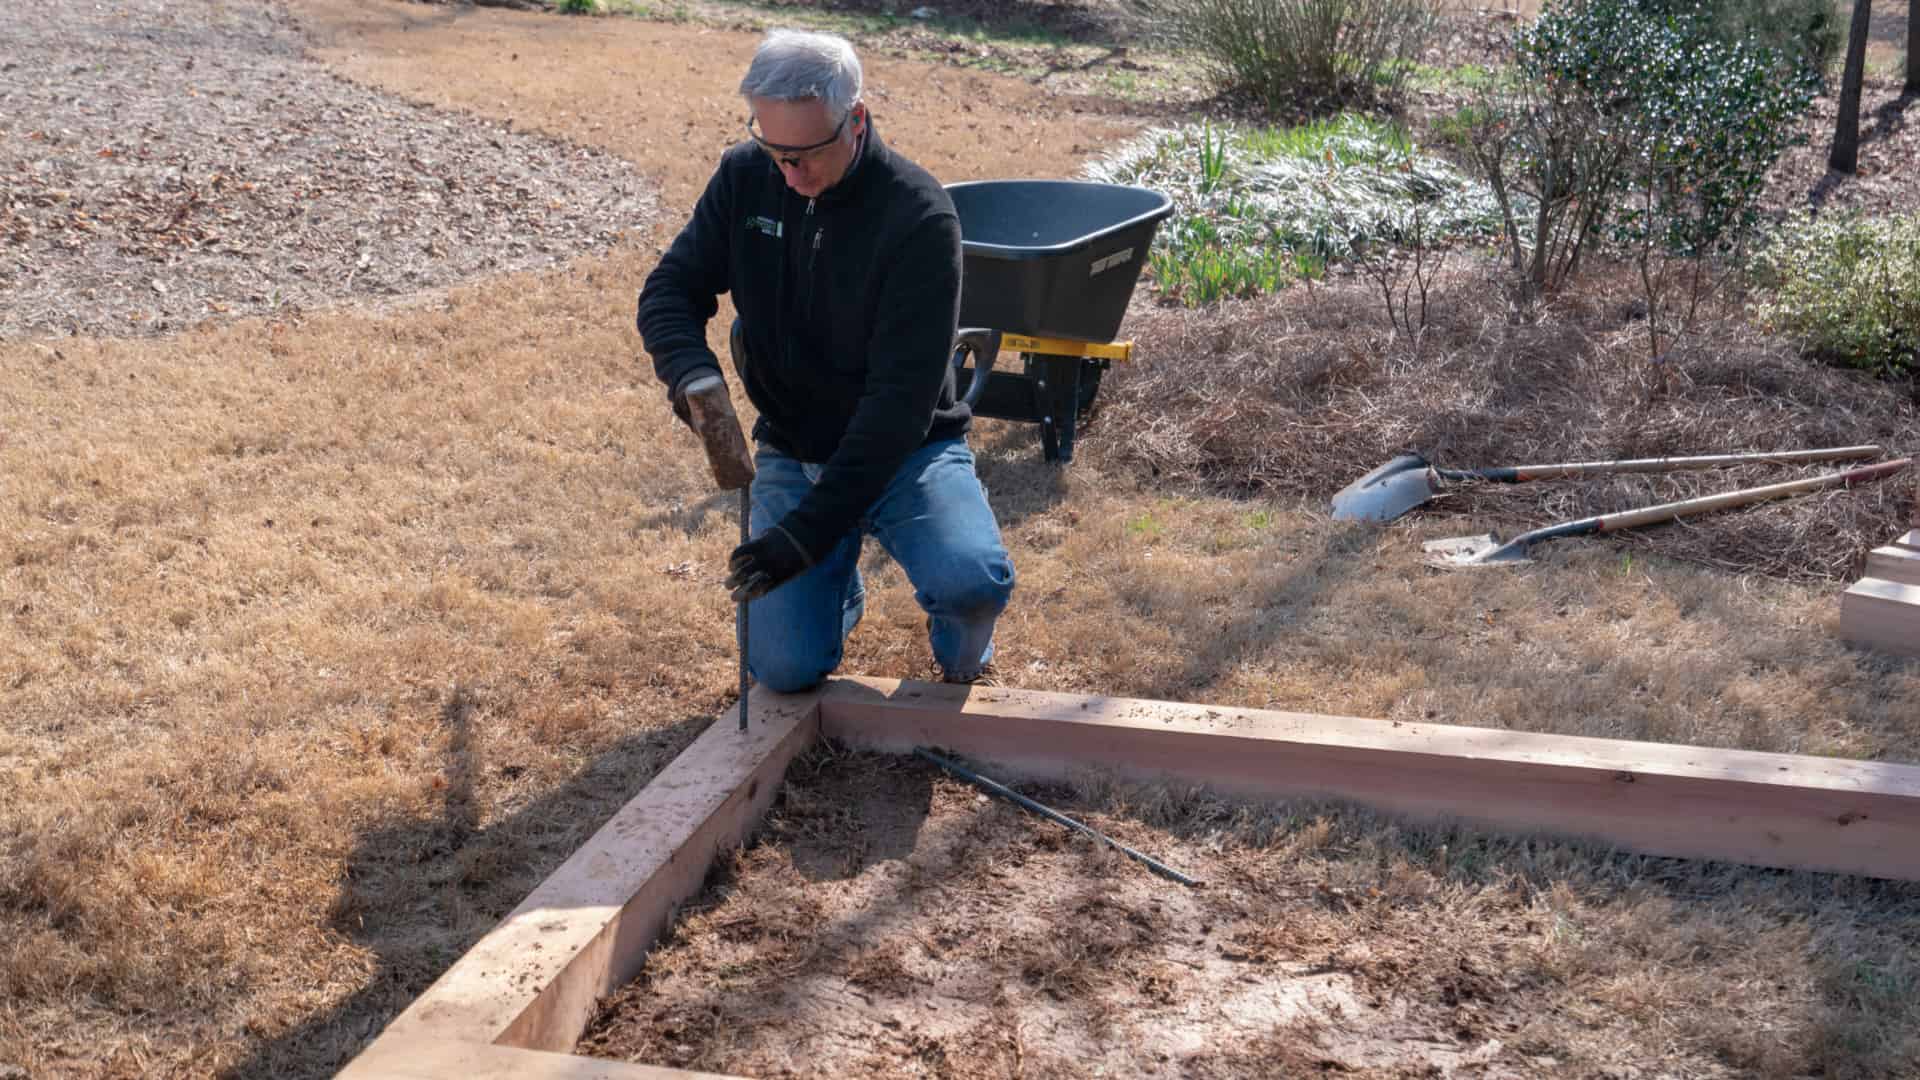
Steps to build a 10’ x 4’ x 18” raised garden bed.
- Cut the wood
Begin by cutting (6) 6 x 6 timbers—each measuring 10-feet, 6-inches in length—and (6) 6 X 6 timbers, each measuring 4-feet, 6-inches in length. Then, drill the appropriate rebar holes in each timber, as outlined in our build schematic.
- Level your bed location
Once the first layer of timbers has been placed, leveled, and squared in your desired bed location, fasten the corners using 10-inch wood screws. Secure the entire layer to the ground with 10 pieces of rebar.
- Layer your timbers
Next, place the second layer of timbers—staggering the corners and fastening them with wood screws. When that is done, secure the entire layer to the first with (10) 8-inch galvanized spikes
- Add hardware cloth
After hardware cloth has been installed, place the third and final layer of timbers. Again, stagger the corners and secure them to one another with wood screws. Secure this layer to the second with galvanized spikes.
- Fill your bed with soil and plants
Several weeks after the build is complete, Doug returns to the owners’ residence to see the raised bed—full of veggies!
To learn more about raised garden beds, and other popular horticulture topics, visit Joe Lamp’l at Joegardener.com and Growingagreenerworld.com.