
Exmark Z Turf Equipment Backyard Life
  • Skip to primary navigation
  • Skip to main content
  • Skip to primary sidebar

Exmark's Backyard Life

Living Happens Outdoors

  • Mowing
  • Outdoor Living
  • Lawn + Garden
  • Ambassadors
  • Originals
  • About Exmark
  • Subscribe to Backyard Life
Search

Grilled Pompano and Pickled Peppers Recipe

July 14, 2020 by Exmark

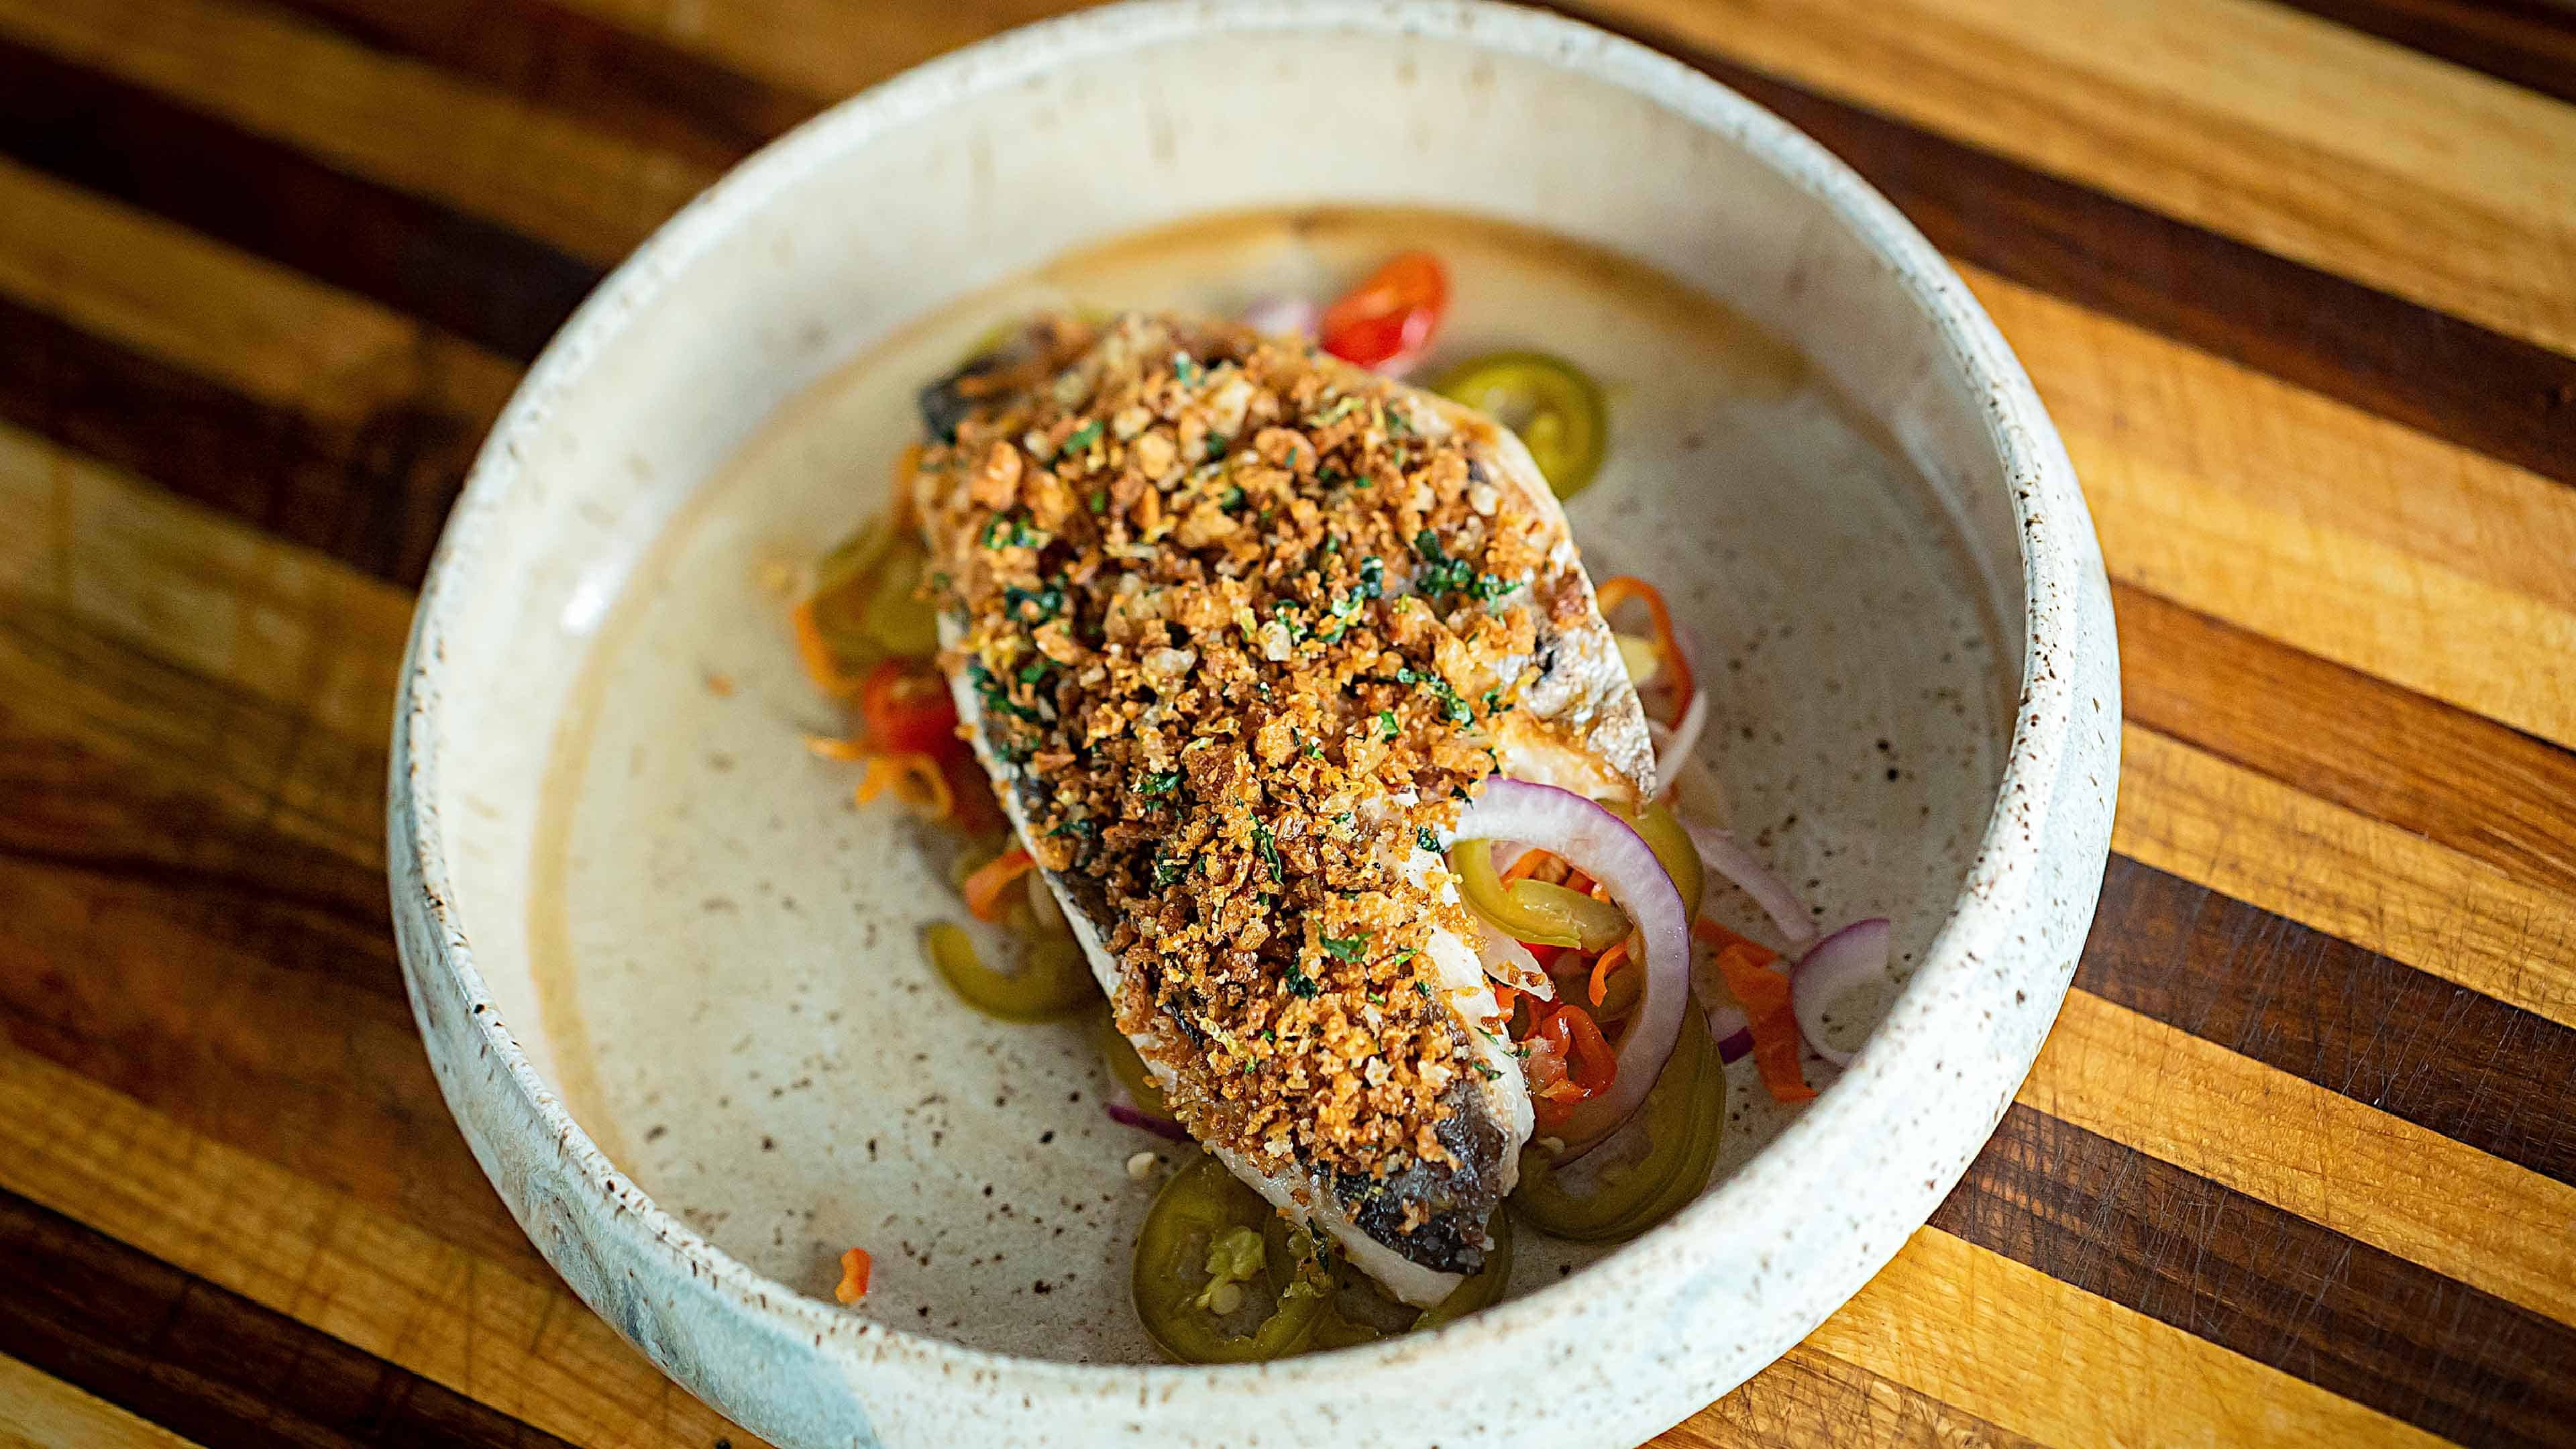
In this Backyard Life Video, watch as Prime Cuts host chef David Bancroft and guest chef Rob McDaniel take a deeper dive into the prep for the grilled pompano recipe featured in the Prime Cuts series.

Follow these prep and cooking steps to re-create McDaniel’s awesome grilled pompano recipe featuring pickled peppers and herb breadcrumbs!
Prime Cuts: Griled Pompano

1. Prepare The Breadcrumbs

PrintPrint

BREADING Ingredients

  • Ciabatta bread

  • Stick butter

  • Clove garlic (pressed)

  • Parsley (chopped)

  • Chives (finely sliced)

Breadcrumb Process

  1. Grind ciabatta bread into fine pieces.
  2. Melt butter and mix in pressed garlic. Mix in ground ciabatta pieces until thoroughly coated and bake.
  3. Combine chopped parsley, chives, and toasted breadcrumbs in a mixing bowl. Zest in 1 lemon.
  4. Return to oven and bake until lightly crisp.

2. Prepare the Pickled Peppers

PrintPrint

PIckled Pepper Ingredients

  • 1 quart Pickled peppers

  • 1 Onion

Pickled Pepper Process

  1. Slice onion into thin slices.
  2. Cover with your favorite pickled peppers.
  3. Stir mixture together and warm over medium heat.

3. Prep the Pompano for Grilling

To start, clean and fillet your Pompano. Then, apply a light coat of peanut oil, salt, and pepper to both sides. But, McDaniel cautions against applying too much, as doing so will lead to your fish tasting like burnt oil.

Heat your grill to 600 degrees. (For this dish, McDaniel opts for a Big Green Egg—not a traditional gas or charcoal grill.)

Place your fillets skin-side down on the grill. Don’t overthink things or panic. Let patience take over. Allow the fillets to cook until they’re nice and crispy on one side (essentially, the whole way through on the skin side) to achieve nice grilled char marks. Once the scales and skin are nice and crispy, flip and allow the flesh side to briefly cook. Then, remove the Pompano from the grill and allow it to rest while you prepare the other ingredients for your final plate-up.

Next, ready your pre-toasted breadcrumbs. (McDaniel opts for ones made from ciabatta bread for this recipe.) Jump to Recipe

4. Plate Your Grilled Pompano

Now, it’s time to add your pre-pickled peppers. (McDaniel uses a variety of in-season peppers like aji dulce, Jimmy Nardello and jalapenos. He also adds a little fresh garlic and red onion for this recipe.)

Prepare your final grilled Pompano dish by lining the bottom of your plate with pickled peppers. Then, place a healthy portion of breadcrumbs on top of your Pompano before placing it atop your pickled peppers.

And, there you have it—one heck of a Pompano recipe that’ll knock the chill off any fall night! Settle in for a crisp and cool evening and get ready to enjoy this delicious grilled pompano. And, it’s made all the better with a spicy kick of peppers and a savory, breadcrumb crunch.
More Prime Cuts Episodes:

  • Kevin Nashan’s Grilled Ribeye Steak
  • Rob McDaniel’s Seared Venison
  • Kevin Nashan’s Chicken and Brussels Sprouts

Filed Under: Outdoor Living Tagged With: cook, Grilled Fish

Seared Venison and Sweet Potatoes Recipe

July 14, 2020 by Exmark

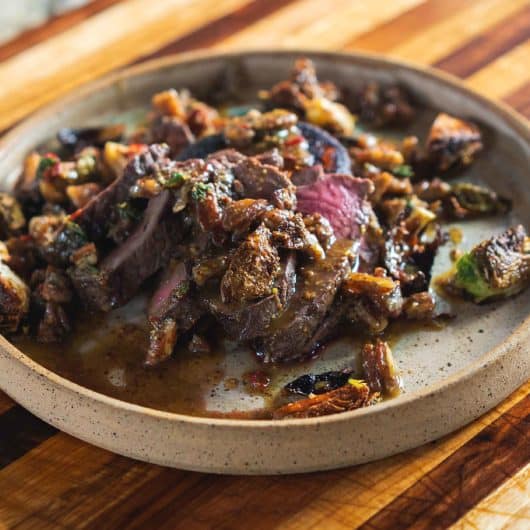
If you watched our Prime Cuts seared venison video and can’t get enough, we’ve got you covered with meal prep and cooking steps from guest chef, Rob McDaniel (formerly of SpringHouse). Follow these easy steps to re-create McDaniel’s delicious, seared venison recipe. Then, serve it all up with roasted Brussels sprouts, caramelized sweet potatoes, and an unbeatable pecan vinaigrette. 

Helpful Venison Tips

Before you get into this recipe, there are a few helpful tips you should bear in mind. Venison is a delicious meat and it’s pretty easy to work with, but these helpful hints will make your life just a little easier.

  1. Trim up your venison filet . You don’t want it to be too fatty; an easy mistake to make . 
  2. McDaniel recommends cooking up the veggies in the same skillet as the venison for what he calls “one-stop-shop” cooking.
  3. You should allow your venison to rest on a separate plate before cutting it up and plating it.
  4. You should slice your sweet potatoes, roast them, and then press them into coins before cooking them on the skillet. 
  5. If you want to plate like a pro, place a sweet potato coin and a row of sliced venison in the center of your plate. Then top both with sprouts before drizzling your pecan vinaigrette to finish it off. This ensures they cook quickly and caramelize perfectly, so you get the best bite every time.
  6. If you want to be fancy, follow McDaniel’s tip. He recommends using venison he’s personally harvested. He allows it to hang and age for up to 14 days before processing.

Seared Venison and Sweet Potatoes Recipe
Pin
Print

Seared Venison and Sweet Potatoes Recipe

Servings

4

servings
Total time

0

minutes

Ingredients

  • venison filet

  • oil

  • salt

  • pepper

  • brussel sprouts

  • pre-roasted sweet potatoes

  • Pecan Vinaigrette
  • sherry vinegar

  • olive oil

  • reduced orange juice

  • homemade mustard

  • thyme

  • arbol chile

  • toasted pecans

Directions

  • Venison
  • Place a cast-iron skillet in a cold oven and allow it to pre-heat to 500 degrees
  • Trim your venison filet and coat it with a light layer of oil
  • Season with salt and pepper
  • Place venison in your pre-heated, oiled cast-iron skillet
  • Sear your venison on each side
  • Sear for 8-10 minutes for medium-rare
  • Brussel Sprouts and Sweet Potatoes
  • Quarter cut the sprouts
  • Drizzle with oil
  • Season with salt and pepper
  • Place sprouts and sweet potatoes in the skillet with your venison
  • Remove your venison at 8-10 minutes and allow the vegetables to roast until tender
  • Mix vinaigrette ingredients in a bowl
  • Plate!

Alright, you’ve got your delicious recipe, and you’re ready to go. Get going on this delicious meal, and maybe consider whipping it up at your next backyard event or just for your family on a Friday night. It’s a versatile dish!


Watch Prime Cuts:

  • Kevin Nashan’s Grilled Ribeye Steak
  • Rob McDaniel’s Seared Venison
  • Kevin Nashan’s Chicken and Brussels Sprouts
  • Rob McDaniel’s Pompano and Pickled Peppers

Want insider access to more prep videos and grilling recipes? Then, start your FREE Backyard Life e-news subscription, today! Simply sign up (below) and we’ll notify you when this—and other bonus content—is waiting in your inbox.

Filed Under: Outdoor Living Tagged With: Backyard Grilling, cook, wild game

Grilled Chicken and Brussels Sprouts Recipe

July 14, 2020 by Exmark

Virtually everyone loves to gather on a great-looking lawn, especially when they’re grilling in the backyard. In this Prime Cuts episode, host David Bancroft and guest chef Kevin Nashan unveil a chicken recipe you and your guests will love. Follow these steps to re-create Nashan’s grilled chicken with Brussels sprouts, chanterelle mushrooms, egg custard and brown-butter vinaigrette recipe.

Grillin’ Up the Chicken

  1. Start by trimming and cleaning your chicken. Then, brine it for approximately two hours. Doing so will ensure it’s juicy and tender once cooked.
  2. Next, it’s time to heat up the grill—500 degrees for gas/charcoal; 750 if you’re using a wood-burning vessel. (Nashan loves to use his Big Green Egg for this recipe.)
  3. Before placing the chicken on the grill, be sure to pat it dry. Although a small step, it’s one that Nashan says will make a big impact on how well your chicken caramelizes.
  4. Pre-heat an iron skillet on the grill. Next, place the unseasoned chicken into the skillet and cover it with a piece of parchment paper. From there, place another iron skillet—or anything heavy enough—on top. This downward pressure will help create a flatter cooking area, as well as facilitate better caramelization.

Custard, Sprouts and Chanterelles

  1. Begin creating your egg custard by whisking together three egg yolks, three whole eggs, parmesan cheese, cream and salt. Once the ingredients reach a custardy consistency, place them in a double broiler to begin gently steaming them as you move to other ingredients.
  2. Begin preparing your Brussels sprouts by placing half-cut pieces, face-down, in a hot oiled pan. Sprinkle in a dash of salt, and place on a cooktop stove, flipping them once the undersides have begun to caramelize. Add a little butter and place them back on the stove. Once fully cooked, place them in a serving container in preparation for your final dish plate-up.
  3. Flip your chicken. Add a pat of butter, rosemary, and thyme alongside it in the skillet.
  4. In the same pan your Brussels sprouts were cooked in, begin roasting the chanterelle mushrooms. Sprinkle them with salt and cook until only a slight color change has been achieved. And, remember to keep your pan super-hot, as they’ll become limp if you don’t.

Final Plate-Up

  1. Once your eggs are velvety, transfer them from the double broiler into a different vessel to prep for plate-up.
  2. Remove the chicken from the grill—basting it in its own juices as you do—in preparation for your final dish plate-up.
  3. Prepare your brown-butter vinaigrette by combining brown-butter gravy, chicken stock, cream and a little lemon.
  4. Prepare your final dish by first placing two large dollops of egg custard in the center of your plate. Then, place vertical cuts of chicken atop each dollop.
  5. Next, add your Brussels sprouts and chanterelles to the plate.
  6. Finally, drizzle your brown-butter vinaigrette over the entire plate’s contents. (Nashan likes to top things off with a preserved Meyer lemon garnish to add a pop of sweetness and fragrance to the finished dish.)

Your end product will be a dish that’s both delicate and delicious. Want insider access to prep videos and recipe ingredients for this Prime Cuts episode? Then, start your FREE Backyard Life e-news subscription, today! Simply sign up (below) and we’ll notify you when this—and other bonus content—is waiting in your inbox.

Make Nashan’s grilled chicken recipe at home with the recipe, below:

Grilled Chicken, Brussel Sprouts and Chanterelles Recipe

PrintPrint

chicken brine Ingredients

  • 4 quarts water

  • 1/4 cup hot sauce

  • 1/4 cup sugar

  • 1 1/2 cups salt

  • Chopped onion

  • Bay leaves

Mix ingredients thoroughly. Place raw chicken in brine and soak for 1.5 to 2 hours.

PrintPrint

chantrelles Ingredients

  • Fresh chantrelles

  • Thyme

  • Clove garlic (pressed)

  • Salted butter

  1. Wash and trim chanterelle mushrooms. Pat dry.
  2. Melt butter in iron skillet. Mix in thyme and garlic. Sautee chanterelles to taste.
PrintPrint

double-boiler scrambled eggs Ingredients

  • Fresh eggs

  • Cream

  • Fresh-grated parmesan

In a mixing bowl, stir eggs with cream and parmesan. Pour into a heated, cast-iron skillet to scramble.

PrintPrint

brown butter sauce Ingredients

  • Unsalted butter

  • Mushroom trimmings

  • Chicken trimmings

  • Shallots (chopped)

  • Sake

  • Sorghum seeds

  • Vinegar

  1. Cut butter into one-inch slices. Heat skillet to medium and melt butter, continuing to stir. As butter melts and begins to become frothy, look for brown specs in the pan. Remove from heat and pour into a heat-proof bowl. Let stand.
  2. Combine mushroom and chicken trimmings with shallots, sake, sorghum seeds, and vinegar over medium heat. Mix in brown butter and reduce until smooth and creamy.
PrintPrint

brussels sprouts Ingredients

  • Fresh Brussels sprouts

  • Salted butter (melted)

  1. Slice Brussels sprouts in half so that each has a flat side.
  2. Roast flat-side down on grill until browned. Remove from grill and place on baking sheet with grilled sides up.
  3. Baste with melted butter and bake until golden brown.

Watch Prime Cuts:

  • Kevin Nashan’s Grilled Ribeye Steak
  • Rob McDaniel’s Seared Venison
  • Kevin Nashan’s Chicken and Brussels Sprouts
  • Rob McDaniel’s Pompano and Pickled Peppers

Want insider access to more prep videos and grilling recipes? Then, start your FREE Backyard Life e-news subscription, today! Simply sign up (below) and we’ll notify you when this—and other bonus content—is waiting in your inbox.

Filed Under: Outdoor Living Tagged With: Backyard Grilling, cook

Grilled Wild-Duck Skewers Recipe

April 24, 2020 by Andy Morgan

Join Andy Morgan for a guide on prepping and cooking the pro fisherman’s grilled wild-duck skewers recipe. Duck is his favorite wild game to eat—and this recipe is one of his favorite ways to prepare it.

Andy Morgan has been hunting, and cooking, duck since he was 13 years old. “A lot of people turn their nose up at duck. But, in my opinion, it’s one of the best pieces of meat you can put on a grill or a stovetop,” says Morgan. “Duck meat is definitely high in protein. It’s a rich, dark meat, and it can hold a lot of flavor if cooked correctly.”

Prepping the Wild Duck with Marinade

Morgan suggests filleting duck into thin slices when cooking it on a grill or smoker, and marinating it for at least 24 hours ahead of time. This will give the marinade time to soak into—and properly flavor—the dark, dense meat. Morgan’s marinade of choice is his infamous “Kentucky sauce” buts Italian dressing with some spices, or any type of store-bought hot sauce will also work just fine.

Once marinated, Morgan then threads his fillets onto the kabob skewers—along with bell peppers, jalapenos, pineapple and bacon. Yet, he encourages you to use whatever veggies you prefer.

Grilling Wild Duck on Skewers

After his duck-and-vegetable skewers have been prepared, Morgan places the kabobs on a 360-degree pre-heated grill. He prefers his duck medium-rare, and warns against overcooking the thin fillets.

Once cooked, he brushes on his infamous “Kentucky sauce.” A recipe handed down from a longtime family friend, Morgan always keeps a big batch in the fridge so it’ll stay fresh and usable for a long time.

Now, all that’s left to do is take them straight from the grill right to your mouth (only stopping occasionally to add some more Kentucky sauce)! Morgan promises this is a dish that’ll quickly become one of your favorites, too.

Andy Morgan's Grilled Wild-Duck Skewers
Pin
Print

Andy Morgan’s Grilled Wild-Duck Skewers

One duck will make 2 to 3 skewers, depending on duck size. Prep time for the skewers will only take about 15 to 30 minutes, depending on how many duck breasts you have. The overall cook time will be about 45 minutes.

Servings

4

servings
Total time

45

minutes

Duck Skewer Ingredients:

  • 2 lbs Duck breast in marinade

  • 3+ skewers (depending on number of ducks)

  • 1-2 slices of bacon per skewer

  • 1-2 bell peppers (or consider adding jalapenos, onions, tomatoes, mushrooms or any veggie of choice)

  • 1 cup chunked pineapple (use more as needed)

  • DUCK MARINADE INGREDIENTS:
  • 1/2-1 cup Italian dressing

  • 1/2-1 cup Allegro hot and spicy (or any marinade of choice)

  • Dash of hot sauce, as desired

  • KENTUCKY SAUCE INGREDIENTS:
  • 1/2 cup butter (1 stick)

  • 4 cups ketchup

  • 4 cups mustard

  • 4 cups vinegar

  • 4 cups sugar

  • 1 tbsp. pepper

  • 1 tbsp. garlic salt

  • 1 tbsp. cayenne pepper (or less if you can’t take the heat)

Duck Skewer COOKING Directions:

  • Preheat grill to 350 degrees.
  • Cut duck breast into thin, long strips.
  • Wash and cut vegetables into 1-inch pieces.
  • Thread ingredients onto skewers. Start with bacon, then duck. Skew both at one end and leave the excess hanging. Then, add a vegetable piece. Thread the hanging duck again, then bacon, and repeat adding a vegetable piece. Thread back and forth to the end of the skewer, adding more duck pieces as needed, layering with bacon, then duck, then pineapple or vegetables. One individual slice of duck should thread 2 to 3 times.
  • Place skewers on grill. Sprinkle with favorite seasoning if desired. Grill one side until bacon starts to crisp. Skewers should cook approximately 5 minutes on each side for a medium cook. But, this will vary depending on the thickness of cut. The skewers are usually done when the bacon is cooked. Duck is best if not overcooked. The temperature should be 170 degrees, but that may be difficult to determine with such small cuts of meat. The meat will continue to cook a little after being removed from the grill. When the duck is almost cooked, brush the Kentucky sauce onto all sides and cook for a few additional minutes to caramelize the sauce.
  • Once the skewers are removed from the grill, let them rest for 5 to 10 minutes before digging in.
  • DUCK MARINADE COOKING DIRECTIONS:
  • Add all ingredients to duck meat and marinade for at least 24 hours to achieve the best flavor.
  • KENTUCKY SAUCE COOKING DIRECTIONS:
  • Melt butter in a large pot over medium-high heat.
  • Mix remaining ingredients together before adding to melted butter in pot. Mix well and stir continuously until the mixture begins to boil. Then, turn the heat down to medium-low and simmer for 15 minutes.
  • The unused sauce can be stored in the fridge for several months.

Filed Under: Outdoor Living Tagged With: Andy Morgan, Backyard Grilling, cook, Outdoor Pro

Chicken Fried Quail Recipe From David Bancroft

April 16, 2020 by David Bancroft

A mouthwatering fried quail recipe with honey hot suace.
Tasty chicken fried quail

Looking for a traditional Southern spin on a game-bird recipe that’s anything but common to most folks? Then, feast your eyes on acclaimed restaurateur, chef and Prime Cuts host Dave Bancroft’s chicken fried quail recipe with pecan streusel and honey hot sauce.

This Backyard Life recipe will let you say “farm to table” and really mean it. Once you’ve brined your quail overnight, this mouthwatering recipe is super straightforward. And, we can pretty much guarantee that your non-hunting friends’ll want to take up the sport so they can serve it in their backyards, too!

Quail Meat Facts:

Quail meat is a sweet treat that is a favorite among hunters and foodies. And, they’re perfect on the barbeque, baked, fried, or stewed. They have a good ratio of meat to bones, and given tenderness and small size, the bones are usually eaten as well, instead of being removed. Overall, they have a delicate flesh with a taste that’s similar to chicken, but more flavorful.

Quails are small birds. One quail would be an appropriate hors d’oeuvre, whereas at least two would be more appropriate for an entrée.

To make this pan fried quail recipe on the grill, prepare the bird as directed and then place in a cast-iron skillet on your heated grill. Be cautious not to overcook quail meat as it will become dry and tough. The quail is sufficiently cooked when the meat is slightly firm to the touch (similar to the feel of a cooked chicken breast) and juices run clear.

Chicken Fried Quail with Honey Hot Sauce
Pin
Print

Chicken Fried Quail with Honey Hot Sauce

Cuisine: AmericanDifficulty: Medium

Start by mixing up the brine and then let the quail sit in it overnight. After that, the fried quail prep is pretty straight forward.

Servings

4

servings
Total time

1

hour 

Chicken-Fried Quail with Honey Hot Sauce Ingredients

Brine Ingredients

  • 4 whole quail

  • 6 Tbsp. Salt

  • 2 Tbsp. Sugar

  • 2 Tbsp. Garlic powder

  • 1 Gallon Water

  • 3 cups Ice


  • Chicken-Fry Ingredients
  • 1.5 cups All-purpose flour

  • 1 Tsp. Baking powder

  • 2 Tsp. Kosher salt

  • 2 Tsp. Garlic powder

  • 1 Tsp. Black pepper

  • 1 Tsp. Paprika

  • 1/2 Tsp. Thyme

  • Pecan Streusel Ingredients
  • 1.5 Cups Pecans

  • 1 Cup Brown sugar

  • 1/2 Cup Sugar

  • 2 Tbsp. All-purpose flour

  • 2 Tsp. Kosher salt

  • 2 Oz. Butter

  • Honey Hot Sauce Ingredients
  • 1 Cup Local wildflower honey

  • 2 Tbsp. Cyrstals hot sauce

Directions

  • Quail brine: Dissolve all seasonings into 1 gallon of warm water, then add the 3 cups of ice to chill it. Submerge your quail in the brine and refrigerate overnight.
  • To fry the quail: Remove your quail from the brine and place directly into chicken-fry mixture. Fry until golden brown, or until internal temperature reaches 165 degrees. Finish by topping your fried quail with pecan streusel and honey hot sauce.
  • To make the streusel: Pulse all ingredients (except butter) in food processor until they reach a crumble form, making sure not to over mix. Remove ingredients from processor, pour into bowl, and mix butter in by hand. Bake at 350 degrees on a baking sheet for 7 minutes.

Candied butternut squash is a great recipe to replace a typical starchy potato side dish . This recipe is cooked backyard style in a Dutch oven on the grill.

Smoked Creamed Spinach Stuffed Tomatoes are another great side dish for this quail recipe. The homemade creamed spinach that picks up the mesquite wood smoke flavor together with the warm soft tomatoes is really a great pairing. 

Finally, if you are looking for more interesting quail recipes, check out ToTable.com, They are a great resource for home-chefs to source recipes and ingredients for hard-to-find foods.

More Game Bird Recipes:

  • Grilled Wild-Duck Skewers Recipe
  • Deep-Fried Cajun Turkey Nugget Recipe
  • Easy 3-Ingredient Smoked Turkey Recipe

Filed Under: Outdoor Living Tagged With: cook

David Bancroft’s Fried Green Tomatoes

March 5, 2020 by David Bancroft

These aren’t just any fried green tomatoes, they’re David Bancroft’s fried green tomatoes. If you don’t know; Bancroft is an Auburn-based James Beard semifinalist. With two fantastic restaurants in Alabama, Acre and Bow & Arrow, you can be pretty dang sure he knows what he’s doing. This recipe is a delicious and unbeatable revamp of the classic southern side dish. These are a fantastic option for your next backyard event and it’s the only thing your guests will be more impressed with than your gorgeous lawn.

Fried Green Tomatoes, Like the Movie?

If you think of the silver screen anytime you hear the mouthwatering phrase that seems to be iconic in the South, you’re not alone. It turns out that quite a few people think the same thing. And, it turns out that quite a few people don’t know the real history of the fried green tomato. 

It turns out that the crispy dish wasn’t associated with the South until the ‘90s. Before then, it was a Midwest and Northeast dish. It may have been brought over by Jewish immigrants in the early 1900s.  

So, how did it become a Southern favorite?  

To answer that, you have only to think of that fantastic, beloved, Kathy Bates-led movie, Fried Green Tomatoes. The movie’s setting in Alabama increased the Southern love for the delicious dish; from there, it took off like wildfire.  

And we should all be so glad it is because, without it, we would never have this delectable Bancroft recipe.  

David Bancroft’s Fried Green Tomatoes
Pin
Print

David Bancroft’s Fried Green Tomatoes

In this recipe, fried green tomatoes are paired with marinated crab and crystal rémoulade. Prepare the Crystal Rémoulade and Marinated Crab first. Pick up store-bought pimento cheese to save time, or prepare your family’s favorite recipe.

Servings

4

servings
Total time

1

hour 

10

minutes

Ingredients

  • Peanut oil, for frying

  • 12 slices fresh green tomatoes

  • 1 cup whole buttermilk

  • 2 cups cornmeal, such as Granary Farms

  • Crystal Remoulade (ingredients and steps below)

  • 1 cup pimento cheese

  • Marinated Crab (ingredients and steps below)

  • Garnish: fresh basil leaves

  • Marinated Crab Ingredients
  • 1 pound fresh Gulf crab, picked clean of shells

  • 1 fresh jalapeño, seeded and minced

  • 1 garlic clove, minced

  • zest and juice of 1 lime

  • 1 tbsp. chopped fresh cilantro

  • 1/2 tsp. kosher salt

  • dash of hot sauce, such as Crystal

  • 1 tbsp. extra-virgin olive oil

  • Crystal Rémoulade Ingredients
  • 1 cup mayonnaise

  • 1/3 cup Creole mustard

  • Juice of 1 lemon

  • 1/2 tbsp. hot sauce, such as Crystal

  • 1 tbsp. Creole seasoning

  • 1 finely minced spicy pickle chip, such as Wickle’s

  • 1 tbsp. water

Directions

  • Fried Green Tomatoes
  • In a medium Dutch oven, fill with peanut oil to halfway full. Heat over medium-high heat until a deep-fry thermometer reads 350° F.
  • Dip tomato slices in buttermilk; dredge in cornmeal.
  • Cook in batches until golden brown, approximately two minutes. Let drain on paper towels.
  • Marinated Crab
  • In a medium bowl, combine all ingredients.
  • Gently toss until combined, being careful to avoid breaking up crab. Refrigerate until ready to serve.
  • Crystal Remoulade
  • In a medium bowl, stir together ingredients from the mayonnaise to the water until combined. Refrigerate until ready to serve
  • Serving
  • For each serving, spread 2 tablespoons Crystal Rémoulade on the bottom of 1 plate.
  • Top with 1 tomato slice. Spread tomato with 2 tablespoons pimento cheese.
  • Top with another tomato slice and 2 tablespoons pimento cheese; top with another tomato slice. Place ¼ cup Marinated Crab on top of tomato. Garnish with basil, if desired.

You’ve got a delicious, new take on a Southern classic to try out. You can pair it with our Backyard Bacon Cheeseburger Recipe by Ballistic BBQ. Or maybe our Honey Curry Chicken Kebabs Recipe. Or you can cook up some of these great Easy Snacks: Homemade Potato Chips for a tasty party spread your friends won’t be able to get enough of at your next backyard event. 

More Like This:

  • Fall Garden Vegetable Side Dishes from David Bancroft
  • Chicken Fried Quail Recipe From David Bancroft
  • David Bancroft’s Top Herbs for Grilling

Filed Under: Outdoor Living Tagged With: cook

  • « Go to Previous Page
  • Go to page 1
  • Interim pages omitted …
  • Go to page 8
  • Go to page 9
  • Go to page 10
  • Go to page 11
  • Go to page 12
  • Go to Next Page »

Primary Sidebar

  • Home
  • Mowing
  • Outdoor Living
  • Lawn + Garden
  • Ambassadors
  • Originals
  • Subscribe
  • Facebook
  • x
  • YouTube
  • Instagram
  • Tiktok

Copyright © 2026 EXMARK - Backyard Life

  • Privacy Policy
  • Terms of Use
  • DMCA

Trending