
Exmark Z Turf Equipment Backyard Life
  • Skip to primary navigation
  • Skip to main content
  • Skip to primary sidebar

Exmark's Backyard Life

Living Happens Outdoors

  • Mowing
  • Outdoor Living
  • Lawn + Garden
  • Ambassadors
  • Originals
  • About Exmark
  • Subscribe to Backyard Life
Search

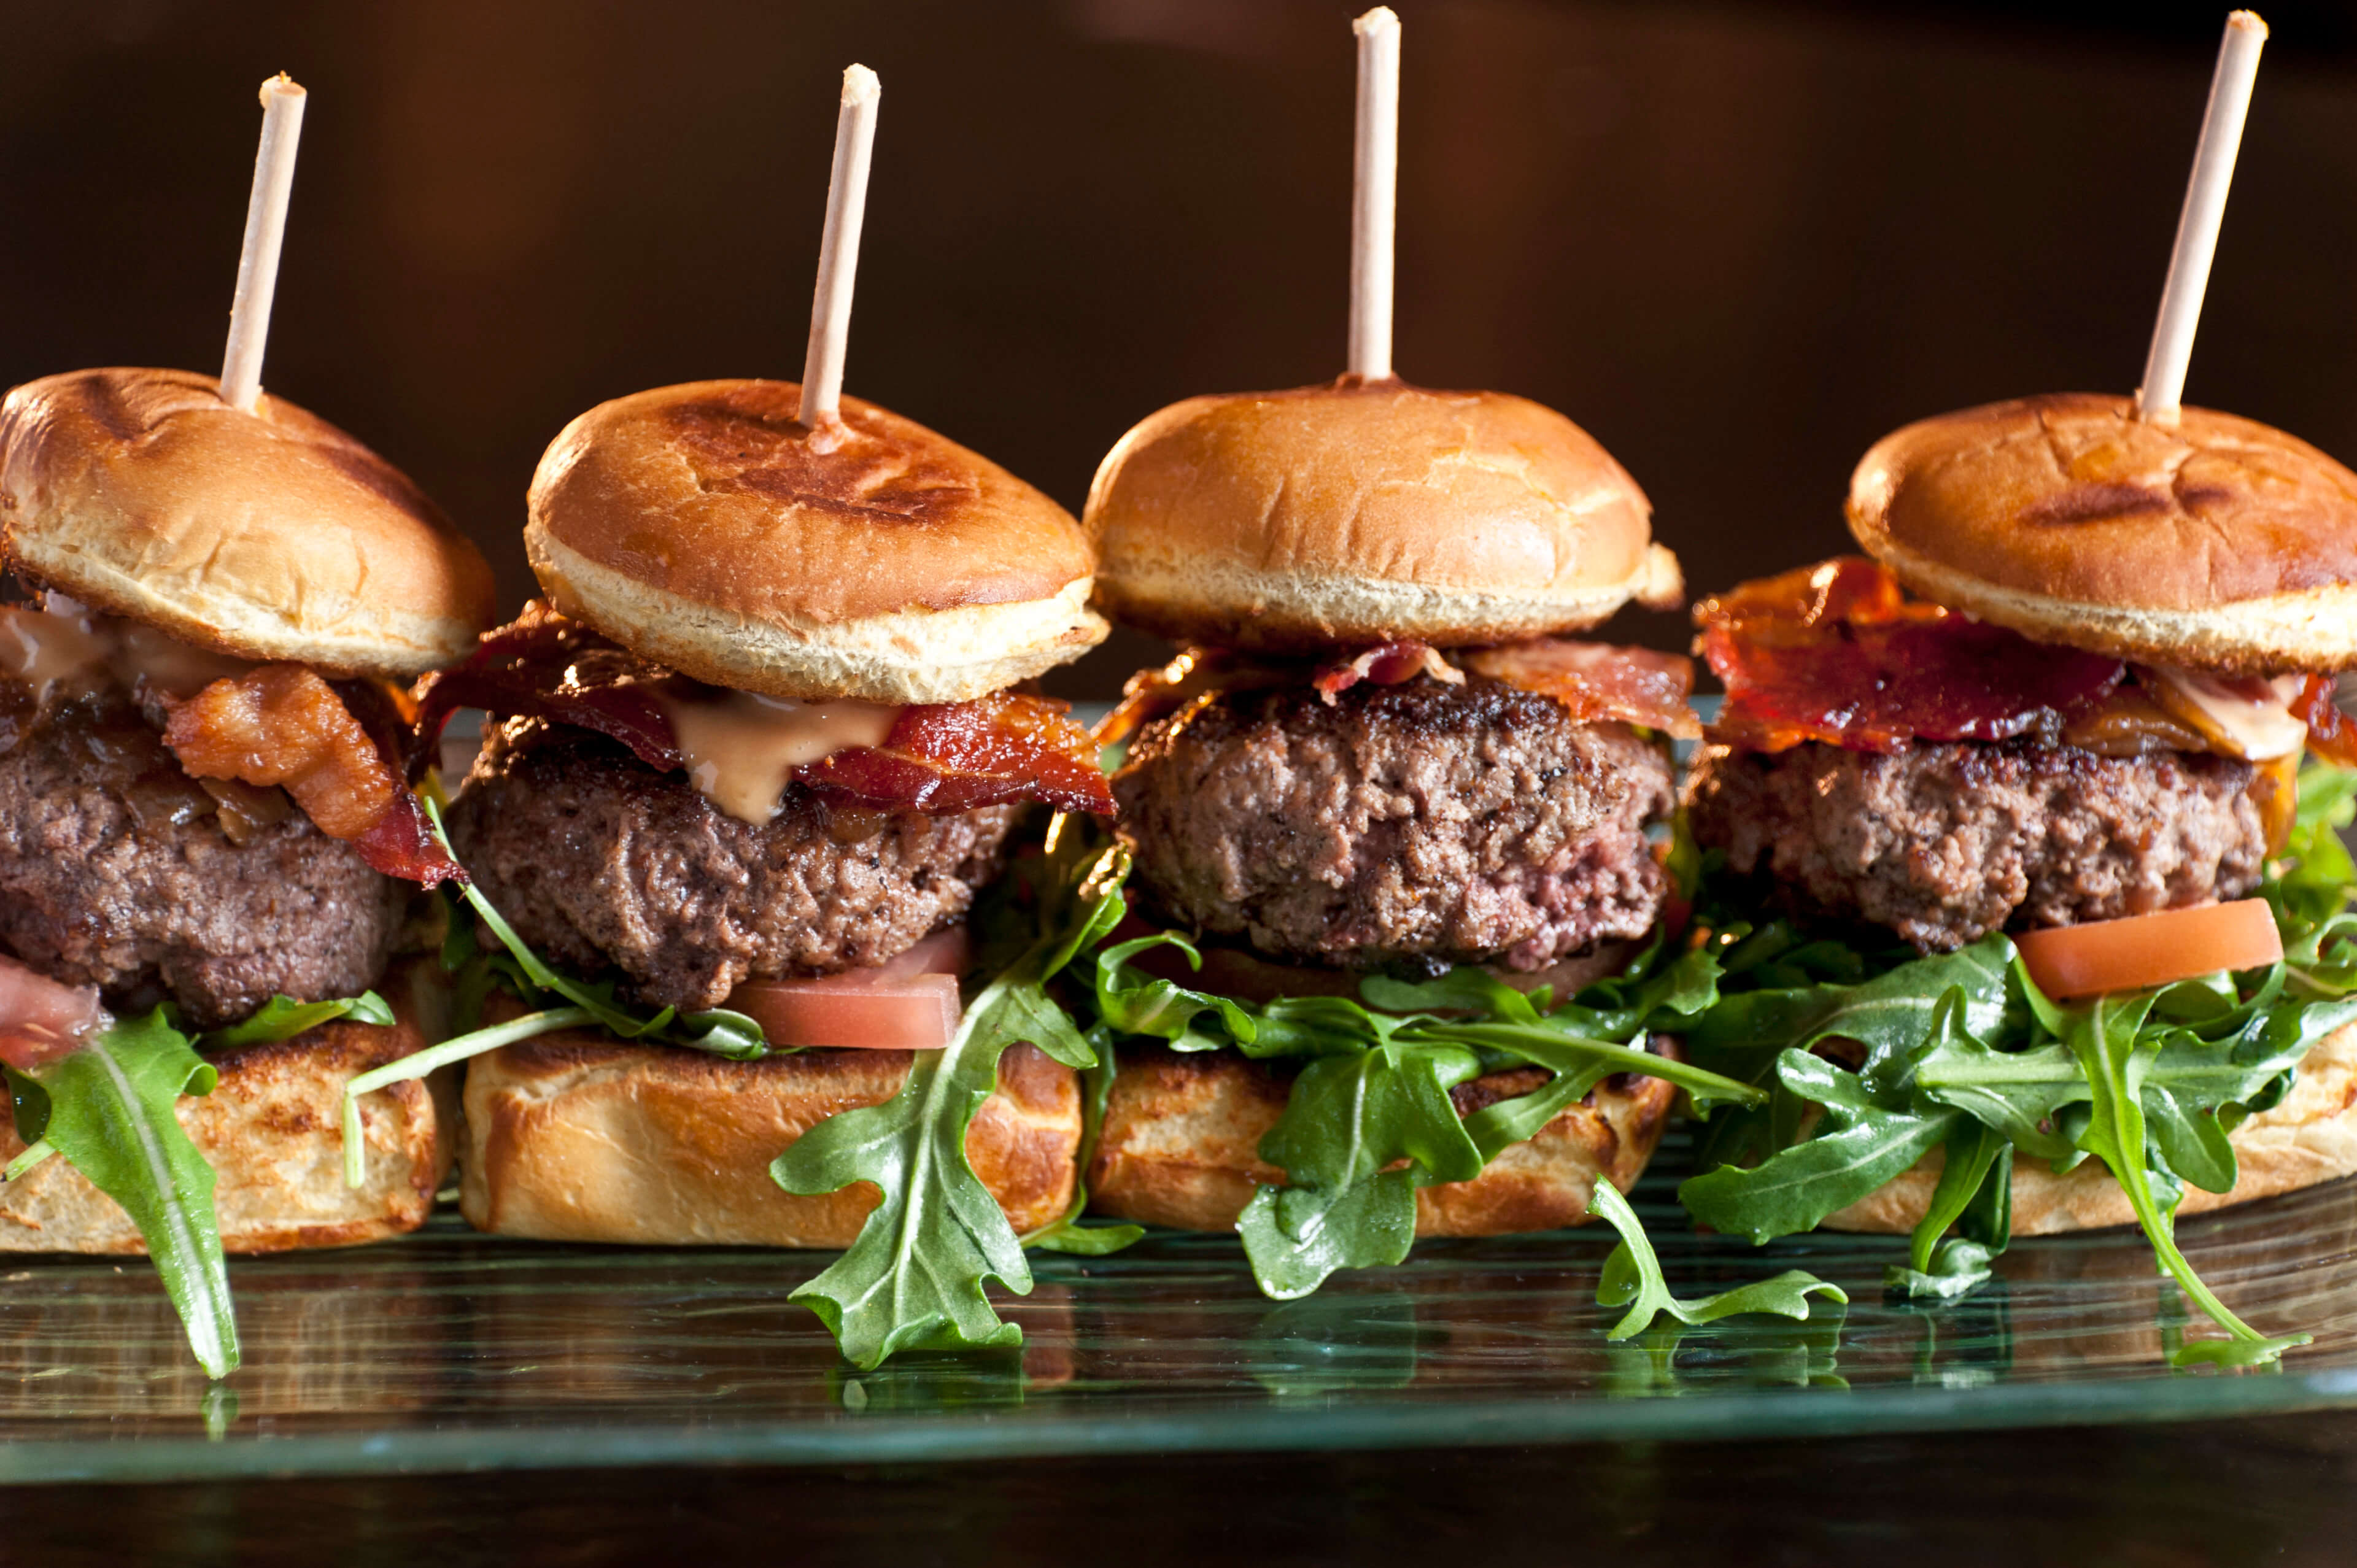
Game Day Party Sliders

January 17, 2020 by Exmark

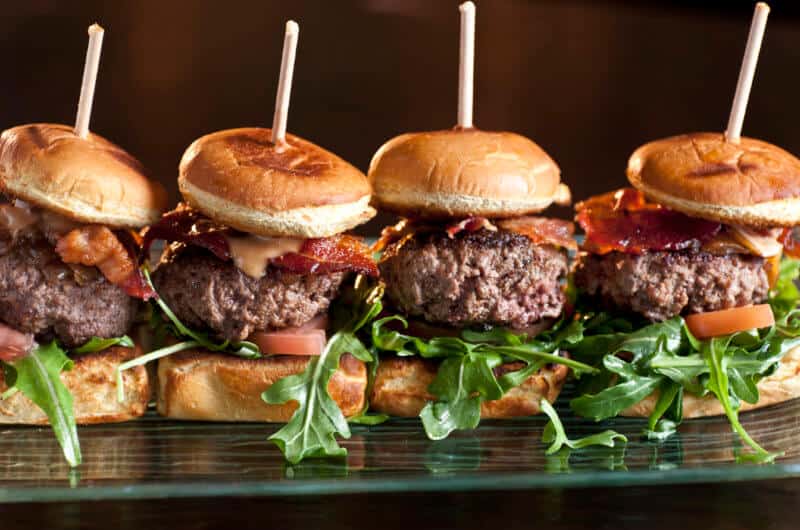
Delicious game day party sliders everyone's sure to love!
Mini kobe beef burgers on black background

Game day is the best day no matter what sort of sport it is, that’s a fact. It’s also a fact that a game day gathering of any kind requires some forethought and effort. Most of us don’t have the time to waste cooking up quality snacks. Fortunately, this delicious party sliders recipe is easy to make and sure to satisfy all your guests. Plus, they’re not too much food so no one has to deal with that belt-loosening fullness. And the best thing about these game day party sliders? Everyone can customize them with their favorite toppings in a snap. 

Fun fact about sliders: they were created by Walter Anderson, founder of White Castle, in 1916! They’re a true classic. Sliders can be thin, almost crispy patties, thicker, mini-burgers, tiny fried chicken breasts, or even veggie burgers. They’re a truly versatile category of snack foods, but the best out there is the traditional burger slider. It’s important to pick high-quality meats for your game day sliders. The last thing you want to do is disappoint your guests with chewy sliders! The bun choice matters, too. Make sure you keep your eyes peeled for soft and delicate mini-buns for your sliders.

If you’re looking for something delicious to pair with your sliders and expand your game day table, try these turkey nuggets from David Bancroft and Michael Waddell. Between the party slider recipe and this delicious turkey nuggets recipe, you’re sure to be crowned king of the game day eats.  
Super Bowl Party Sliders
Pin
Print

Super Bowl Party Sliders

Servings

16

servings
Total time

30

minutes

Ingredients

  • 2 pounds ground beef (or buffalo)

  • 6 cloves garlic

  • 1 white onion, chopped

  • 2 Tbsps Worcestershire sauce

  • Salt and pepper to taste

  • Mini slider buns 1 per slider

  • Condiments as desired.

Directions

  • In a bowl, mix all ingredients together. Add jalapenos, cheddar cheese, bacon bits, or any extras you desire. You can also save those items for toppings.
  • Divide meat into 16 mini patties (approximately 8 per pound). Flatten patties.
  • Place in skillet or grill on medium-high heat. Cook for approximately 3-4 minutes per side.
  • While sliders are cooking, heat up the buns. When sliders are ready to eat, place your slider on a bun.
  • Top your party sliders with cheese, pickles, red onions, tomatoes, bacon, mustard, ketchup, sauerkraut, Anaheim peppers…the options are endless, and yummy.

Notes

  • These sliders can be made with ground beef, buffalo meat or even ground turkey or chicken. For turkey and chicken, skip the Worcestershire sauce and just add salt and pepper. Whatever your meat preference, these party sliders will still taste great.

See? This party sliders recipe is simple, but they’re absolutely delicious. This is going to be your go-to game day recipe. You’ll spend less time by the grill or stove and more time hanging out with your friends, watching the game. 
More Game Day Recipes:

  • Easy Snacks: Homemade Potato Chips
  • Back to the Basics: Homemade Guacamole
  • Grilling Curry Chicken and Veggie Kabobs with Joe Thomas

Filed Under: Outdoor Living Tagged With: Backyard Grilling, cook, Game Day

How to Cook a BBQ Beef Brisket

January 10, 2020 by Greg Mrvich

If you’ve been wondering how to cook a beef brisket, we have the recipe for you! Greg Mrvich from Ballistic BBQ shows you a no-fail way to create a mouthwatering brisket that the whole family’ll love.

Giving you a hint for how he makes the magic happen, Mrvich starts with a 10- to 18-pound beef brisket. To kick off the cook, he uses a custom marinade that he injects once every square inch throughout the entire brisket. And, to cover every part of the meat, he alternates the injections with and against the grain. He suggests seasoning it liberally with the beef rub of your choice. Or, he also offers up a quick salt, garlic, and black pepper mix. 

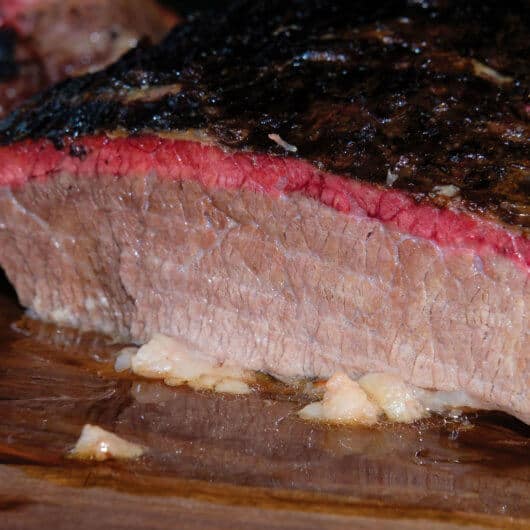
When it’s time to cook, place the meat with the fat-cap in the direction of the heat source to protect it. Then, close your cooker lid and let it cook until “the bark has set.” In other words, says Mrvich, the seasoning is firm enough so that you can’t scrape it off with your fingernail.

At this point, the brisket should have a nice mahogany color. Remove it from the pit and wrap it—along with a little beef broth—tightly in two sheets of aluminum foil. Then, place the brisket back on the pit.

Continue cooking the brisket until either a meat probe or toothpick can be pushed into the meat and removed with little to no resistance. It should feel almost like it’s going into warm butter, says Mrvich. At this point, it’s time to finish up the brisket. Pull it off the grill, vent the foil, and let it rest for about 30 minutes prior to slicing. Now, it’s simply time to kick back and enjoy the (tasty) fruits of your labor.

How to Cook a Brisket with Ballistic BBQ
Pin
Print

How to Cook a Brisket with Ballistic BBQ

Make your own mouthwatering BBQ beef brisket with this recipe from Greg Mrvich of Ballistic BBQ.

Servings

4

servings
Total time

1

hour 

30

minutes

Ingredients

  • 1 beef brisket in the 10–18 pound range

  • 2 cups injection of your choice (optional)

  • SPG Rub
  • 1 cup Kosher salt

  • 1/2 cup garlic powder

  • 1/4 cup black pepper

Directions

  • Inject marinade, then season brisket liberally on all sides. Allow it to sit at room temperature so it can “sweat” through the rub.
  • At the same time, pre-heat your cooker to 250° Fahrenheit, using the wood of your choice.
  • Place the brisket with the fat-cap in the direction of the heat source, to protect the meat. Close the lid on your cooker and let it cook until the bark has set, for approximately 7 hours. In other words, the seasoning is no longer a paste, and is firm enough so that you can’t scrape it off with your fingernail.
  • Once the bark is set and the brisket has that nice mahogany color, remove the brisket from the pit and wrap it tightly in two sheets of aluminum foil, along with a little beef broth. Place the brisket back on the pit.
  • Continue cooking the brisket until it is “probe-tender.” In other words, a meat probe (or toothpick) can be pushed into the meat and removed with almost no resistance. It should feel almost like it’s going into warm butter.
  • Once the brisket is done cooking, pull from the pit, vent the foil and let rest about 30 minutes prior to slicing.

Filed Under: Outdoor Living Tagged With: Backyard Grilling, Ballistic BBQ, cook, Game Day

Ballistic BBQ’s June Bug Burger

January 10, 2020 by Greg Mrvich

Ballistic BBQ: June Bug Burger recipe
Ballistic BBQ Bacon Double Cheeseburger

Thanks for checking out this Ballistic BBQ recipe and video. In this episode, backyard grilling guru and Ballistic BBQ host Greg Mrvich will show you how to cook this June Bug burger bacon double cheeseburger. Mrvich named this burger “June Bug” because his home state of California is also home to insects bearing this name. These little critters are metallic looking, and, for whatever reason, love to eat figs.

When filming this video in Northern California, Mrvich’s neighbor provided a jar of homemade fig jam. This promptly triggered the light bulb to go off in his head to create a burger with the jam. But, of course, Mrvich then put his twist on it—making it with a bacon-fig jam.

To make the spread, mix bacon, onion, Fresno pepper, and fig jam in a skillet. (You can buy fig jam at a supermarket or Mediterranean market.) For the actual burger, you’ll need basic, toasted sesame seed buns. For the patties, use good-quality, 80/20 ground chuck with a little kosher salt. Cook the burgers to medium inside, then add aged white cheddar to one patty and American cheese to the other. Mrvich suggests choosing pasteurized American cheese over individually wrapped cheeses. To build your June Bug burger, start by adding arugula to the bottom bun, stack the American cheeseburger, then the cheddar burger. Then, add the bacon-fig jam and top bun. Enjoy!

Ballistic BBQ's June Bug Burger
Pin
Print

Ballistic BBQ’s June Bug Burger

Cuisine: AmericanDifficulty: Easy

Choose 80/20 ground chuck for these burgers. Check out the video to watch Mrvich in action.

Servings

4

servings
Total time

30

minutes

Ingredients

  • 2 pounds ground chuck, each patty should weigh about 1/4 pound

  • Bacon-fig sauce (enough for 8 burgers)

  • 4 slices bacon, chopped

  • 1/2 white onion chopped

  • 1/2 teaspoon minced Fresno (or ripe jalapeno) pepper

  • 3/4 cup fig jam

  • Arugula

Directions

  • Render down bacon in a hot skillet, then add chopped onion. Add chopped pepper and continue to cook. Once the onion starts looking translucent, add jam and stir. Place on a lower heat and allow sauce to simmer. In the meantime, toast hamburger buns on the grill.
  • Season patties with a little kosher salt and place on the grate, over direct heat. Watch the sides of the patties as they cook, and flip once there is a color change halfway up the sides.
  • After the flip, place one slice of aged white cheddar on one patty and American on the other. By the time the cheese melts, the burgers are done.
  • Building the burger. Place a little arugula down on the bottom bun. Place the patty with the American cheese on top of the arugula. Patty with white cheddar on top of American cheese. Top with warm bacon-fig sauce. Crown with the top bun.

    Enjoy!

Recipe Video

Filed Under: Outdoor Living Tagged With: Backyard Grilling, Ballistic BBQ, cook, Game Day

Searing Tommy Steaks with Ballistic BBQ

January 10, 2020 by Greg Mrvich

Grilled Tomahawk steaks recipe and video from Ballistic BBQ
Grilled Tomahawk steaks with a homemade coffee rub. Yum!

Join Ballistic BBQ host Greg Mrvich as he sears up some nice Tomahawk steaks with a homemade coffee rub. Yum! Widely seen as a BBQ guru, Mrvich assures viewers that it’s not a sin to put something other than salt on a steak. Robust steaks, he says, can handle extra flavor like coffee, and the two go hand-in-hand together.

Coffee Rub Ingredients. To start, Mrvich suggests using a grinder to give your pre-ground coffee an even finer texture. Next, mix a little kosher salt and some granulated garlic, black pepper, and brown sugar into your finely ground coffee. (The sweetness of the sugar will balance the flavor of the coffee, Mrvich explains). Then, add paprika and cayenne pepper for a little heat. Finally, mix all of your ingredients thoroughly before beginning to liberally season your Tommy steaks. .

Tommy Steak Prep and Cooking. While your BBQ grill or kettle cooker (which is what Mrvich likes to use) is warming up, allow your steaks to rest. Lump charcoal on one side so you it achieves a slow burn. If you’re using an electric grill, keep one side of the grill turned off, or the two outer grills and the middle one off. When it’s time to put the steaks on the grill, put a little foil on the bones to protect them while cooking. Place the steaks on the side of the grill that isn’t on, or not over direct heat.

Wait until your steaks have reached 120 degrees Fahrenheit before pulling them off the kettle cooker, suggests Mrvich. Then, take them into the house to rest and bring the temperature up to 129 degrees Fahrenheit before direct searing them for approximately one minute per side. Before serving, cut the meat off the bone, then slice into nice pieces.

What’s next, you ask? Simple: Pure enjoyment!

Searing Tommy Steaks with Ballistic BBQ
Pin
Print

Searing Tommy Steaks with Ballistic BBQ

Ballistic BBQ host Greg Mrvich shares his Seared Tomahawk Steak recipe made with a salty sweet homemade coffee rub.

Servings

4

servings
Total time

30

minutes

Ingredients: STEAK & COWBOY COFFEE SEASONING

  • 2 bone-in ribeye steaks (Tomahawk cut if available)

  • 1/2 cup kosher salt

  • 1/4 cup finely ground coffee

  • 1/4 cup granulated garlic

  • 2 tbsps. ground black pepper

  • 1 tbsp. paprika

  • 1 tsp. cayenne pepper

Directions

  • Mix ingredients for seasoning blend in a sealed container. Liberally season steaks on both sides with coffee seasoning, then set steaks aside and allow to “sweat” through the spices. 
  • Preheat kettle cooker or grill to 250ºF, using indirect heat (as shown in video). If using a gas grill, light only one set of burners off to the side.
  • Place steaks on the indirect side of the cooker and close lid. Mrvich suggests inserting a meat probe to monitor the internal temperature of the steaks as they cook. Flip steaks at about 85ºF.
  • Once steaks hit 120ºF, remove them from the cooker, and loosely cover them with aluminum foil.  Allow the steaks to rest while you increase the temperature of your cooker.
  • When your cooker is nice and hot, sear the steaks over DIRECT heat for about one minute on each side.
  • Once seared, remove steaks from the cooker, and let them rest for about 10 minutes before slicing. 

Recipe Video

Filed Under: Outdoor Living Tagged With: Backyard Grilling, Ballistic BBQ, cook

  • « Go to Previous Page
  • Go to page 1
  • Interim pages omitted …
  • Go to page 10
  • Go to page 11
  • Go to page 12

Primary Sidebar

  • Home
  • Mowing
  • Outdoor Living
  • Lawn + Garden
  • Ambassadors
  • Originals
  • Subscribe
  • Facebook
  • x
  • YouTube
  • Instagram
  • Tiktok

Copyright © 2026 EXMARK - Backyard Life

  • Privacy Policy
  • Terms of Use
  • DMCA

Trending