Exmark Z Turf Equipment Backyard Life
  • Skip to primary navigation
  • Skip to main content
  • Skip to primary sidebar

Exmark's Backyard Life

Living Happens Outdoors

  • Mowing
  • Outdoor Living
  • Lawn + Garden
  • Ambassadors
  • Originals
  • About Exmark
  • Subscribe to Backyard Life
Search

Build a Garden Trellis This Weekend

April 21, 2023 by Exmark

Everyone’s always looking for ways to help reinvent their outdoor spaces. That’s where a DIY garden trellis comes in handy! This versatile build provides a great space to let vining plants grow, creates some shade from the harsh summer sun, and helps redefine areas of your backyard. So, follow along in this episode of Done-In-A-Weekend Projects and discover how to build your very own DIY garden trellis.

Download the instructions here:

Done-in-a-Weekend-Garden-TrellisDownload

Tools

  • Table saw
  • Circular saw
  • Jig saw
  • Orbital sander
  • Drill/driver and bits
  • Tape Measure
  • Pencil
  • Sawhorses/worktable
  • Eye and ear protection

Materials

  • (3) 2 in. x 4 in. x 8 ft. Cedar
  • (4) 4 in. x 4 in. x 8 ft. Cedar posts
  • (2) 2 in. x 8 in. x 8 ft. Cedar (for the corbels)
  • (1) 2 in. x 6 in. x 6 ft. Cedar (side bracket/beam support)
  • (2) 2 in. x 6 in. x 10 ft. Cedar beams
  • (4) Post Brackets (optional, to attach to wood deck)
  • 2 ½ in. Deck Screws
  • 1 ¼ in. Deck Screws
  • Wood Stain
  • Wood Sealer
  • Wood Glue

Parts Preparation

  • Rip and Cut Trellis Pieces—Rip the 2 in. x 4 in. x 8 ft. pieces down to 1 ½ in. x 1 ½ in. x 8 ft. on the table saw for the top trellis pieces. Then, rip the boards being used to make the 1 in. x 1 ½ in. x 60 in. long middle trellis boards, 1 in. x 1 ½ in. x 48 in. short side trellis boards, and 1 in. x 1 ½ in. x 16 in. trellis brackets down to thinner 1 in. widths. Then cut all pieces to length according to the dimensions and cut list.

Cut List

Sides—Make the following cuts with the 4 in. x 4 in. x 8 ft. posts, ripped 2 in. x 4 in. x 8 ft. boards, and 2 in. x 6 in. x 6 ft. board:

  • (4) 3 ½ in. x 3 ½ in. x 96 in. posts
  • (2) 1 in. x 1 ½ in. x 60 in. long middle trellis boards
  • (4) 1 in. x 1 ½ in. x 48 in. short side trellis boards
  • (4) 1 in. x 1 ½ in. x 16 in. trellis brackets
  • (2) 1 ½ in. x 5 ½ in. x 36 in. top side brackets

Top Trellis and Corbels—Make the following cuts with the 2 in. x 6 in. x 10 ft. boards, ripped 2 in. x 4 in. x 8 ft. boards, and 2 in. x 8 in. x 8 ft. boards:

  • (2) 1 ½ in. x 5 ½ in. x 120 in. beams (with shaped ends, see step 2a in build plans for details)
  • (11) 1 ½ in. x 1 ½ in. x 24 in. top trellis boards
  • (4) 1 ¼ in. x 7 ½ in. x 32 in. corbels (see step 4 in build plans for cut details)

DIY Garden Trellis Build Steps

For the full build steps, open and download the DIY garden trellis build plans PDF to get started.

Download the instructions here:

Done-in-a-Weekend-Garden-TrellisDownload

That’s it! Now all there’s left to do is pick out the perfect area of your yard, and enjoy the shade, sights, and support your brand-new DIY garden trellis has to offer.

More Like This:

  • How to Build a Paver Walkway
  • How to Build a Pergola
  • DIY Garden Bench Build For $100

Filed Under: Lawn + Garden Tagged With: build, garden, Weekend Projects

Build a House Number Planter Box This Weekend

April 21, 2023 by Exmark

You can change a lot about your house—but the one thing that’ll always stay the same is your house number. This address planter box project gives your home a fresh look, letting you display your house number while adding some floral flair. And, it gives your mailperson something beautiful to look out for during their daily route. So, follow along and give your house number a fresh, new look with your own DIY house number planter in this Done-In-A-Weekend Projects episode.

Download the instructions here:

Done-in-a-Weekend-House-Number-PlanterDownload

Tools

  • Miter saw
  • Drill
  • Tape Measure
  • Eye and ear protection

Materials

  • 1 in. x 10 in. x 6 ft. cedar board
  • 2 in. trim head screws
  • Wood sealer
  • Wood stain
  • Cast iron numbers, according to your street address

Cut List

  • Take the 1 in. x 10 in. x 6 ft. cedar board and make the following cuts:
    • (1) 1 in. x 5 ¾ in. x 9 ¼ in. front panel
    • (2) 1 in. x 5 ¾ in. x 7 in. side panel
    • (1) 1 in. x 7 in. x 7 ¾ in. bottom panel
    • (1) 1 in. x 9 ¼ in. x 37 ½ in. back panel

House Number Planter Build Steps

For the full build steps, open and download the DIY House Number Planter Box Plans PDF to get started.

Download the build instructions here:

Done-in-a-Weekend-House-Number-PlanterDownload

That’s it! Now all there’s left for you to do is grab some soil and your favorite flower, find the perfect space on the front of your home, and hang your brand-new house number planter. Your mailperson will thank you later.

More Like This:

  • Front Porch Railing 411 With Danny Lipford
  • Front Yard Landscaping Ideas with Doug Scott
  • How to Choose Plants for Landscaping

Filed Under: Outdoor Living Tagged With: build, Deck + Patio, lifestyle, Weekend Projects

Build a Picnic Table This Weekend

April 11, 2023 by Exmark

More space for food, drinks, and fun is a must for any party. This DIY picnic table ups the ante on entertainment and utility, letting you build a perfect place to drop in an icebox, s’mores station, or planter, all while providing even more space to sit at your next backyard get-together. So, follow along and reimagine your next party with your own DIY picnic table in this Done-In-A-Weekend Projects episode.

Download the instructions here:

Done-in-a-Weekend-DIY-Picnic-TableDownload

Tools

  • Miter saw
  • Table saw
  • Drill/driver and ½ in. drill bit
  • 2 in. hole saw
  • Pocket hole jig
  • Tape measure
  • L square or T square
  • Pencil
  • 120-grit sandpaper
  • 80-grit sandpaper
  • Clamps
  • Eye and ear protection
  • Foam brushes
  • Fine sanding block

Materials

Picnic Table

  • (2) 1 in. x 4 in. x 8 ft. boards
  • (5) 2 in. x 4 in. x 8 ft. boards
  • (4) 2 in. x 8 in. x 8 ft. boards
  • (2) 2 in. x 6 in. x 8 ft. boards
  • (2) 4 in. x 4 in. x 8 ft. boards
  • 2 ½ in. pocket hole screws
  • 1 ¾ in. deck screws
  • (8) 5⁄16 in. x 3 in. bolts
  • (8) 5⁄16 in. washers
  • (8) 5⁄16 in. wood anchors
  • Pre-conditioner
  • Stain
  • Exterior spar varnish

Dining Bench*

  • (4) 2 in. x 6 in. x 8 ft. boards
  • (6) 2 in. x 4 in. x 8 ft. boards
  • (2) 4 in. x 4 in. x 8 ft. boards
  • 2 ½ in. pocket hole screws
  • Pre-conditioner
  • Stain
  • Exterior spar varnish

*Materials are doubled to accommodate for two benches

Picnic Table Cut List & Build Steps

For the full cut list and build steps, open and download the DIY picnic table PDF to get started.

Download the guide here:

Done-in-a-Weekend-DIY-Picnic-TableDownload

Now that you have your own DIY picnic table, all there’s left to do is invite over some friends and family and enjoy your next backyard gathering.

Filed Under: Outdoor Living Tagged With: build, Deck + Patio, lifestyle, Weekend Projects

Build a DIY Firewood Rack This Weekend

March 17, 2023 by Exmark

Fall and winter weather means warm, crackling fireplaces, and those toasty spring and summer months mean bonfire parties with s’mores a-plenty! But fires mean firewood, and that can present a pretty big problem: where do you go about storing it? Well, there’s no need to fret about storage with this quick cinderblock DIY firewood rack project.

A firewood rack might seem like a complicated build, but this Done-In-A-Weekend Project is one of the simplest we’ve ever done. In fact, you’ll be able to make quick work with your weekend downtime—leaving you with more time work in the garden or even mow the lawn.

Download the instructions here:

Done-in-a-Weekend-DIY-Firewood-RackDownload

Tool List

  • Miter saw
  • Eye and ear protection
  • Gloves
  • Tape measure
  • Level
  • Pencil

Cut List

Large Rack

  • (2) 2 in. x 4 in. x 10 ft. boards (pressure treated)
  • (2) 8-foot landscape timbers (pressure treated)
  • (3) standard cinder blocks

Small Rack

  • (2) 2 in. x 4 in. x 10 ft. boards (pressure treated)
  • (2) standard cinder blocks

Build Steps

  1. Measure, mark, and cut your 2 in. x 4 in. boards into 5-foot pieces. 
  2. For the smaller rack, lay the two cinderblocks side by side, holes up. For the larger rack, place two of the cinderblocks at either end of the length of the landscape timber, holes up. Place the third cinderblock in the middle of the other two to work as support.
  3. For the larger rack, lay the two lawn timber planks across the cinderblocks and then check to ensure they’re level.
  4. For the smaller rack, turn the 2 in. x 4 in. boards so the wide sides are facing inwards. For the larger rack, place the cut 2 in. x 4 in. pieces into the holes of the cinderblocks, small sides facing inwards.
  5. To ensure the security of your build, resituate the two lawn timbers so they’re as tightly placed against the 2 in. x 4 in. planks as possible. 
  6. Load up your wood!

It’s really that simple! This quick and easy DIY firewood rack build gives you plenty of storage, so you can keep your summer bonfires blazing higher—or keep your fireplace crackling throughout those winter months.

Download the instructions here:

Done-in-a-Weekend-DIY-Firewood-RackDownload

More Like This

  • Build a DIY Vertical Garden This Weekend
  • How to Build an Outdoor Pizza Oven Station
  • Build a Hanging Daybed This Weekend

Filed Under: Outdoor Living Tagged With: build, lifestyle, Weekend Projects

Lawn Aeration Tips and Tricks

August 23, 2022 by Exmark

A healthy lawn is a happy lawn, but do you know how to go about keeping it green all summer long? That’s where knowing the why, how, and when of aeration comes into play. In this Done-In-A-Weekend Projects episode, join landscape designer and host Doug Scott to get the low-down on lawn aeration. He’ll help you get the know-how on the proper machinery to use, learn why aeration is a great way to keep your lawn healthy, and discover how to aerate your soil.

Download an in-depth PDF to see aeration benefits in action:

Aeration 101Download
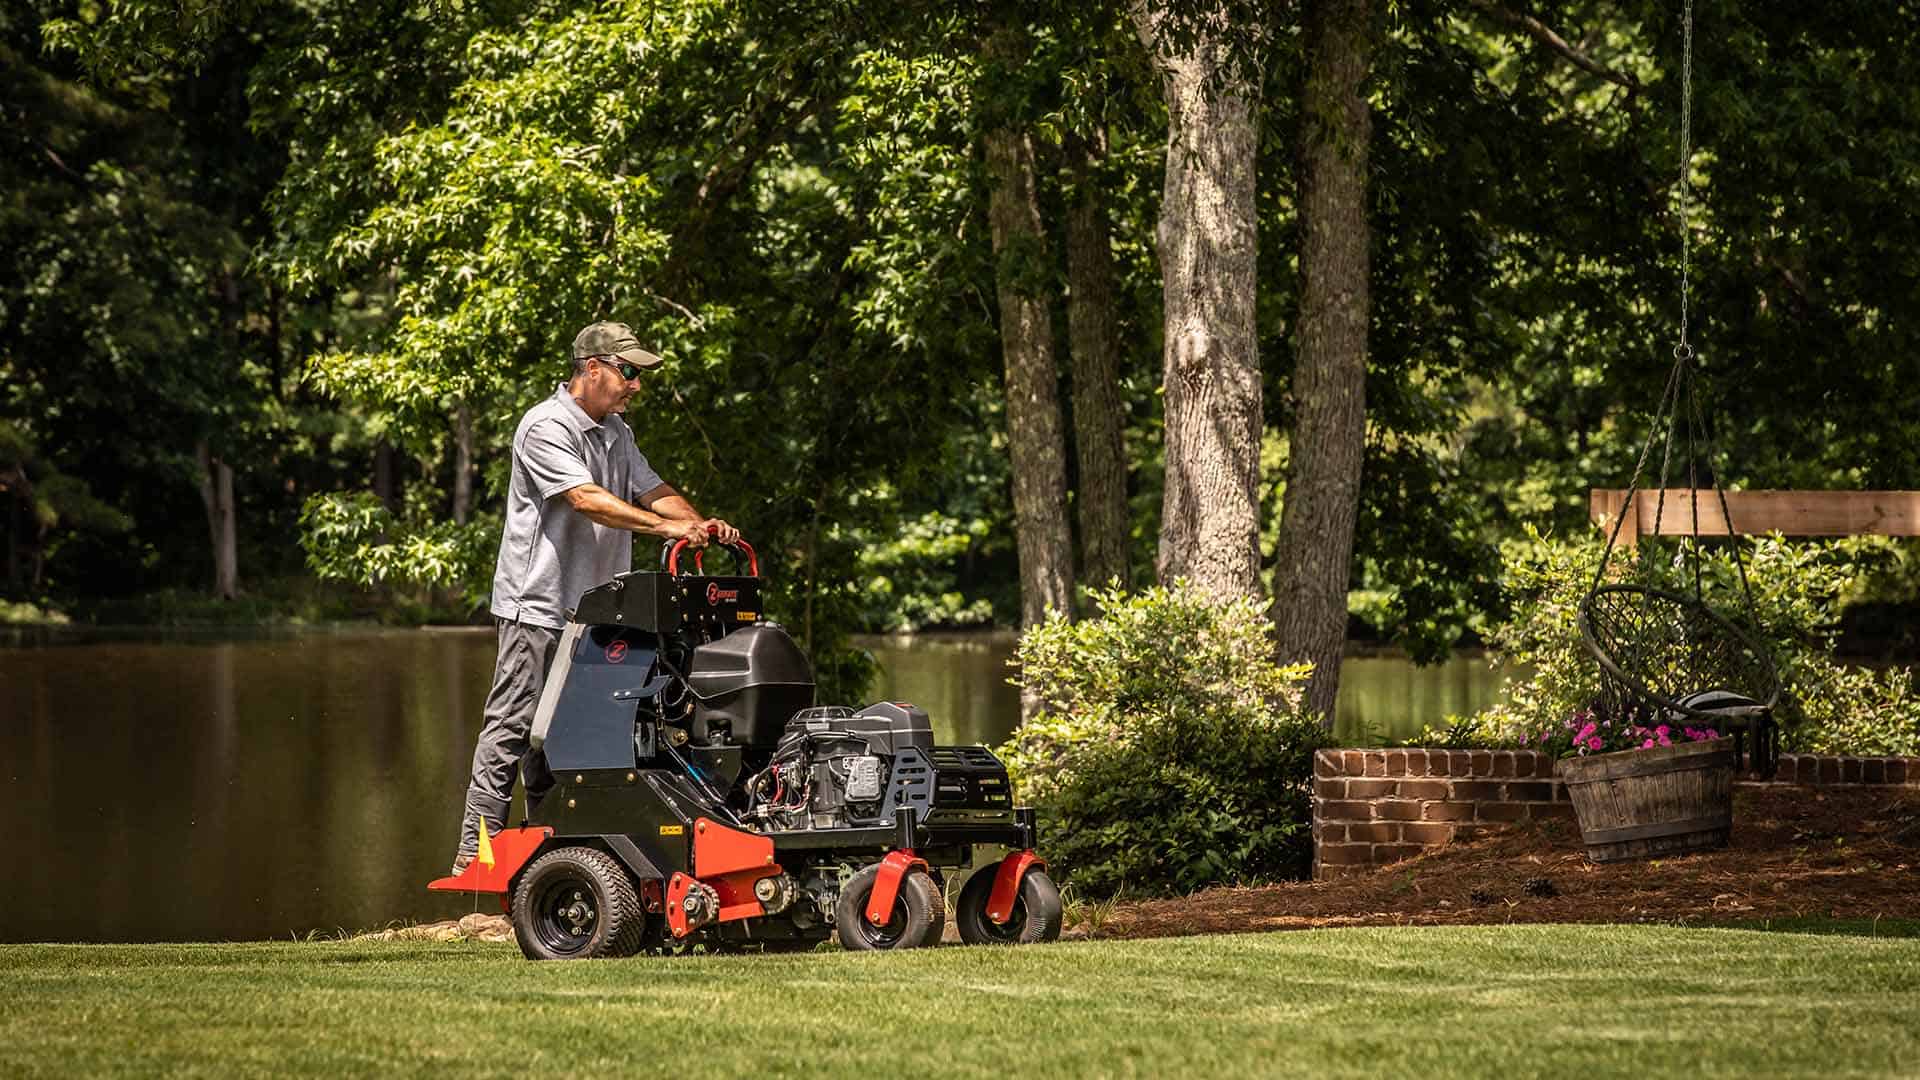
Man standing on exmark aerator using it in yard

Why Aerate?

Aeration is the process of creating holes in your lawn to break up compacted soil. This allows the necessary air, water, and nutrients can get through to your grasses’ roots. Without these, it’ll be a maintenance nightmare—and your lawn will look worse for wear.

Compaction occurs when vehicles or equipment run over your yard, pushing the soil down and packing it tightly together. Compaction also takes place when you and your family are outside enjoying the backyard life—people walking, kids playing, or pets running across your lawn can make it nearly impossible for the necessary air, water, and nutrients to reach the roots.

That’s not to mention the soil makeup in your area. If you live in an area with a heavy concentration of clay, your soil may already be compacted. It can then more easily become compacted in the future, making aeration the smart thing to do annually.

Lawn Aeration Methods

Now that you know the “why” of aeration, it’s time to learn the “how.” All you need to see if your lawn is compacted is a screwdriver! Just drive it into your lawn—if you can’t do it easily, it means your soil is compacted and it’s time to bring out your aerator.

Aerators fall into two categories: core (or plug) and spike. Core aerators are heavily recommended for larger jobs. They consist of rows of hollow tines that remove plugs of soil and lay them across the top of your yard. This leaves you with a lawn that’s no longer compacted and plugs of dirt that’ll break down over time.

For a less expensive option, spike aerators look (and work) exactly how they sound—they’re just a small spike that you use to poke holes in the ground. However, they’re considered less effective given that they don’t go as deep and sometimes wind up further compacting the soil.

When to Aerate Your Lawn

For warm-season grasses—such as Zoysia, Bermuda, and Centipede—you’ll want to aerate your lawn in the spring or early summer. Warmer seasons are when these grasses are growing most rapidly.

Conversely, cool-season grasses—such as Fescue, Kentucky Bluegrass, and Perennial Ryegrass—are best aerated in early fall or early spring. Cooler seasons are when top growth slows and root growth increases. As always, it’s best to do your research on the type of grass you have in your yard so you can know when to aerate it.

Need-To-Know Terms

While researching how to best care for your lawn, there are two other aeration-related terms that you’ll frequently come across: dethatching and overseeding. As the name suggests, dethatching is the removal of the thick layer of thatch on your yard. Thatch is the decomposition of organic matter (dead grass, leaves, stems, etc.) that builds up between your turf and soil. It eventually accumulates to the point where the air, water, and nutrients can no longer reach your grasses’ roots. This will require you to remove this layer to help your lawn thrive.

On the other hand, overseeding is when you sow seed directly over a lawn to fill in bare spots or improve the density of your grass. This is often done just after aerating to help the grass seed take root.

Now that you have everything you need to know about aeration, there’s only one thing left to do: get outside, get aerating, and help your lawn breathe. Your yard will thank you later.

Download an in-depth PDF to see aeration benefits in action:

Aeration 101Download

More Like This:

  • How to Spot and Prevent Lawn Disease
  • 6 Tips to Learn How to Overseed Your Lawn the Right Way
  • Lawn Watering Tips by Grass Type

Filed Under: Lawn + Garden Tagged With: Lawn + Grass Care, Spring Lawn & Garden, Weekend Projects

A 12-Acre Northeast Georgia Dream Yard

August 12, 2022 by Exmark

Want to experience a 12-acre family dream yard just outside the hustle and bustle of metro Atlanta? Join landscape architect, author, and Dream Yards host Bill Slack as he travels to Jefferson for a visit with Hollie and William Mann and their two kids on their northeast Georgia dream yard.

Less Work and More Play

When asked for their inspiration behind their dream yard, the Manns cite how they wanted to balance their time between work and family, while having plenty of space for their family to play and grow. A true labor of love, their house and property required a lot of renovation and upkeep when they first moved in. From unfinished bathrooms to a nonexistent driveway, it’s safe to say they had their work cut out for them. However, they were up for the job and overcame all of these issues—the ultimate testament to their desire for creating the perfect yard.

While designing their yard, Hollie’s biggest inspiration was to have enough room to walk around chairs, the pool, and other entertainment spots so they could comfortably entertain when they have family and friends over. They designed everything with functionality and practicality in mind, creating beautiful outdoor areas that are as beautiful as they are comfortable, supporting how they want to live life outdoors.

Family Fun and Responsibility

When asked about their favorite features, the Manns have nearly too many to count. Regardless, Hollie’s favorite location is their entertainment area—complete with a beverage center, pool, and grill area—giving William the perfect place to stretch out to watch baseball games and giving the kids enough room to safely play and lounge around in the pool.

When it comes to their kids’ favorite parts of the yard, the man-made treehouse is hard to beat. Complete with a ninja-style obstacle course, it’s perfect for them and their friends to hang out after a long school day.

Their eldest son, Jax, has a spot on the property that’s even more special to him: his own chicken coop, complete with 22 chickens—something that he’s been asking for since he was six years old. He’s in the coop daily taking care of his flock, and even has his own company to sell the farm fresh eggs. With the profits from his company, he hopes to buy his own truck or Jeep (or both) when he’s old enough to drive, on top of paying for his own college degree.

A Dozen Acres to Mow

With 12 acres and two kids to care for, it’s safe to say that Hollie and William have their work cut out for them. That’s why they turn to Exmark mowers to give their yard a maintained, immaculate look, all year-round. For over ten years, they’ve enlisted the help of Nathan Osbourne of Legacy Landscape Solutions—and his team of Exmark mowers—to help keep their yard immaculate. From hardscape to walkways, bushes, and (of course) tons of grass, he and his team never cease to amaze.

Now that you’ve had a taste of an ultimate dream yard, what will yours look like?

Filed Under: Outdoor Living, Rural Lifestyle Tagged With: lifestyle

  • « Go to Previous Page
  • Go to page 1
  • Go to page 2
  • Go to page 3
  • Go to page 4
  • Go to page 5
  • Interim pages omitted …
  • Go to page 11
  • Go to Next Page »

Primary Sidebar

Stay Connected

Keep living your best backyard life all year round. Get alerts on the latest Original Series updates, along with the inspiration and know-how you need to enjoy backyard life to the fullest!

Loading
  • Home
  • Mowing
  • Outdoor Living
  • Lawn + Garden
  • Ambassadors
  • Originals
  • Subscribe
  • Facebook
  • x
  • Instagram
  • YouTube
  • Pinterest

Copyright © 2025 EXMARK - Backyard Life

  • Privacy Policy
  • Terms of Use
  • DMCA

Trending